Water on Earth Activities for Kids

We drink water, cook with water, bathe in water, swim in water, clean with water, etc. I’d say water is pretty important and definitely integral to our lives. Come and explore the wonderful world of water with your students by learning about why water is important on Earth and how much water on the Earth is usable. Plus, check out some water activities you can do at home or in the classroom!

How much water is on Earth?

Most of the Earth is covered in water. In fact, 71% of the Earth’s surface is covered by water. But only 3.5% of that water is freshwater and most of this water is frozen!

Why is water important to Earth?

People use water for many reasons, including cleaning, cooking, drinking, and bathing. Water is also essential for growing crops. Many places use water to heat and cool buildings, and it can be used to generate electricity. Plus, drinking water is important for our health. Water is very important!

The EASY Way to Teach Water and the Water Cycle

Learn all about water on earth with this hands-on unit that has everything you need.

Scripted lessons… check!
Vocabulary … check !
Reading passages… check!
Hands-on projects … check!
Engaging? Double check!

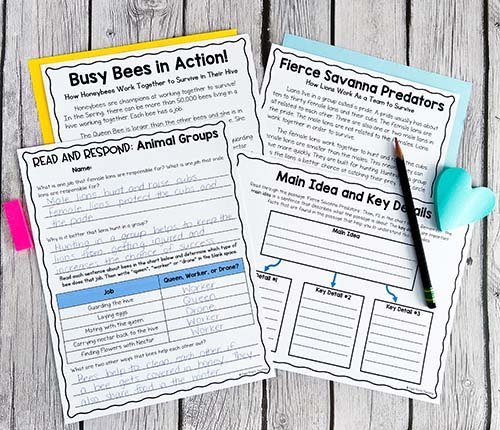
Reading about Water on Earth

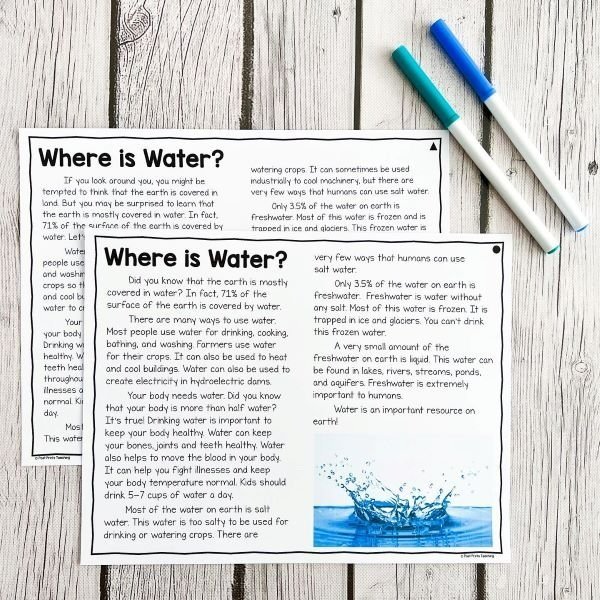
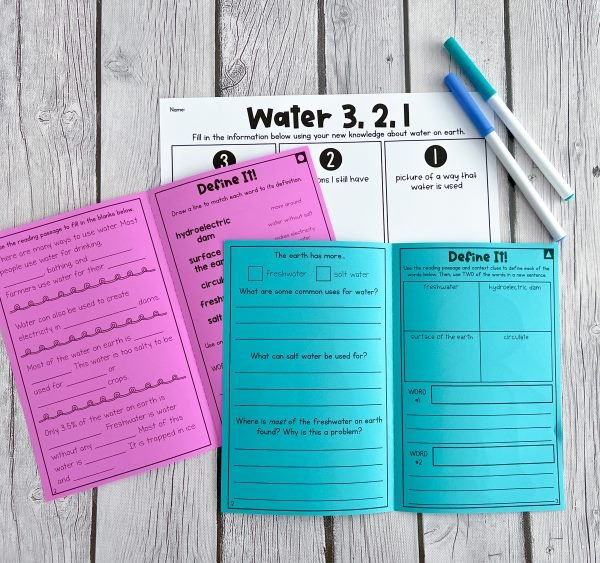
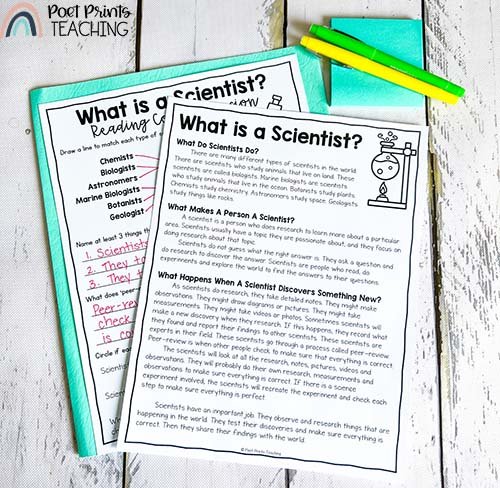
When students are learning a new science topic, it’s helpful to have students read about it. Plus, it integrates reading right into our science lesson! These Water on Earth’ reading passages and comprehension booklets are perfect for this. They’re in two levels so you can differentiate them for your class.

With the passages, students will learn about why water is important. They will also be learning where water is found and the different types of water (ie. freshwater and saltwater). Grab them here!

Group Activity - exploring Sources of Water

Group projects are a great way to have students engage with a topic and also practice skills like teamwork, conversation, problem-solving, and task management.

This Sources of Water group activity is perfect for all of this! Assign each group a water source to research. Each group will become the ‘expert’ on their own source of water, and teach the rest of the class about it. Eventually, the whole class will have compiled a booklet of information about all of the water sources!

The activity can be found in my Water Cycle science unit!

Project: Conserving Water

Conserving Water: a flipbook project based on a guided inquiry question.

To teach about water conservation, a guided inquiry project is a great option!   This flipbook (included in the Water Cycle unit) will have students answering the question “How can we conserve water?” Students can pick their own focus and then do some basic research.

While doing this project, students will look for information about why conserving water is important and they will hunt for solutions to the problems they discover. They will present their information in the flipbook.

Alternatively, students could present their findings in another way: website, a model, a book, a TED talk, etc.

This project (teaching guide, flipbook template, assessment) is a part of the complete Water Cycle Unit.

water cycle bag activity

The Water Cycle Ziploc Bag is an old favorite for many. This water activity is a great way to have students observe the water cycle in action. Simply draw the water cycle on a ziplock back, add some water, seal the bag, and tape the ziplock to a window. After a few days, you’ll be able to see the water in action: evaporation and condensation. Take a detailed look at the activity right on the Ziploc website!

become a water detective

Have children brainstorm ways they can conserve water. Here are a few quick and practical things they might come up with:

  • Turn the tap off while brushing their teeth

  • Put a water saver in the toilet tank

  • Limit time in showers

  • Instead of dumping undrunk water down the sink, use it to water plants

  • Rewear clothes if they aren’t dirty so the washing machine doesn't have to be run as many times

Become drip detectives. Did you know that a leaky toilet can waste 200 gallons of water per day? And a dripping faucet can waste over 5 gallons of water per day! So teach children to become leak detectives so the problem can be fixed right away!

Water is everywhere! We use water every day and often it goes underappreciated. Children can learn a lot about water when a few fun and engaging water activities are implemented. 


Sun Safety Activities for Kids

“Fun in the sun!” We’ve all heard it. We’re probably all said it. Playing in the sun truly is a blast… until someone gets a sunburn. Then it’s not so much fun. So let’s endeavor to teach our students about sun safety and sun protection. There are some fun sun safety activities that can help you teach this concept.

Text: Activities, videos, and lessons to teach all about staying safe in the sun. Image: sunscreen tubes are displayed on a blue background

Why is the Sun So Dangerous?

While the sun is wonderful for giving off light and heat, it also gives off ultraviolet radiation. Too much UV radiation can be dangerous. Even on cloudy days, people can get sunburned. UV rays can affect our eyes, skin, and immune systems.

Ways to stay safe in the sun for kids

The good news is, there are some easy ways to stay safe in the sun. Here are a few ideas:

  • Wear UV-blocking sunglasses

  • Wear a hat to keep the sun out of your eyes

  • Don’t look directly at the sun

  • Stay in the shade when outside

  • Wear sunscreen (water resistant and 30 SPF or higher)

  • Wear proper clothing to protect your skin from the sun

  • Make sure to drink plenty of water

  • Limit your time in the sun, especially between 10am and 2pm when UV rays are the strongest

The EASY Way to Teach About Sun Safety

Looking for a fast and fun way to teach about sun safety that includes nonfiction reading and a STEM craft? In just a few clicks you can grab all of the pieces you need: lesson plans, informational text, reading comprehension, an anchor chart template, and a hands-on activity!

reading about sun safety

The nonfiction reading passage ‘Looking at the Sun’ is a great way to explore Sun Safety and meet educational standards.

Reading about sun safety is another great way to learn. This nonfiction passage will help students learn about the sun as a source of energy and a potential hazard. After reading, they will complete comprehension questions to deepen their understanding of the topic. A connected drawing activity really helps to tie it all together!

sun safety videos for kids

For teaching sun safety for kids, there are some amazing Youtube videos out there. Here are just a few:

Sun Safety Craftivity

In this sun safety craftivity, students will create a self-portrait with a twist. They will use a blank outline to create a miniature version of themselves and dress their person in the ultimate sun-safe outfit. Students can use a variety of materials like construction paper, tissue paper, popsicle sticks, cotton balls, glue, etc while creating their person. Let the creative juices flow!


Sunscreen experiment

There’s a fantastic sun safety experiment floating around the internet. I tried to find the original source of this experiment but was unable to locate it because there are several variations of the activity. It’s an engaging and clever way of illustrating the importance of sunscreen. Here’s how the experiment goes:

  1. Fold a black piece of construction paper in half

  2. Smear sunscreen all over the palm side of a child’s hand.

  3. Have the child press their handprint onto the paper.

  4. Place the paper in a sunny spot and wait for a few hours

When you check on the paper in a few hours, all the spaces without sunscreen will be bleached lighter by the sun. The areas with sunscreen will still be the original black color! 

 If you want to get extra creative with this experiment, you can have students fingerpaint pictures onto the black construction paper, instead of doing a handprint. They will love seeing their design on the bleached paper! 


Sun safety is an important concept to teach our students. Not only is it interesting to learn about, it’s also a health issue that needs to be focused upon. There are some great sun safety activities and experiments out there, so let’s make this topic exciting for students!

Pin me for later!

Spring Science Activities for Kids

Robin Williams once said, “Spring is nature’s way of saying ‘Let’s Party’!” Isn’t this so true! Spring brings a welcome break from winter and it’s the time of year when nature seems to spring to life (pardon the pun). Plus, there are some amazing Spring science activities and experiments to incorporate into the curriculum which will help Spring come alive in your classroom.

Seed Dispersal

Whether it’s watching a youtube video, reading nonfiction passages, creating a comic, doing a STEM challenge or going for a nature walk, there are plenty of ways to engage students while learning about seed dispersal. There is also a fun (and slightly) messy STEM activity to teach seed dispersal that might involve students flinging seeds. If any of these activities intrigue you or just for more information about teaching seed dispersal, check out this blog full of activities and science lessons.


Pollination

Pollination is a fascinating topic that can be taught through a variety of activities. The Busy Bee Game is a great way to let students get out energy and also teach the concept of pollination. Reading informational texts about pollination helps students glean information about the topic. Engaging in a STEM challenge that involves paint and a paper flower will allow students to use their creative thinking and problem-solving skills. Or simply go for a nature walk to observe pollinators in action! To find more information, including rules for the game and specifics about the STEM challenge, check out this blog that’s just full of pollination activities for kids.


what do plants need to survive?

I think many teachers can agree that teaching the concept of plant growth by growing plants is a fun spring science experiment. Why not turn this into an inquiry project? Have students read about what plants need to survive. Then conduct an experiment about why plants need sunlight. This blog gives a more detailed overview of some ideas and resources for teaching about plant growth.


Life Cycles of Living Things

With spring comes the birth of living things: chicks, lambs, flowers, cherry blossoms, bunnies, the list goes on and on. So why not teach the life cycle of living things during the spring? Turn it into a Spring science activity. Explore both animal and plant life cycles with activities and experiments that are perfect for second and third grades. These lessons and experiments are so engaging and easy to plan.


Biodiversity

Another great spring science activity would be to have students explore local plants, animals, ecosystems, and food chains. This helps them to discover biodiversity in their area. Why not study these things when they are actually visible in the springtime? This unit features directed lessons, project-based learning, inquiry projects, and more. And make sure to check out this biodiversity freebie! Read more about biodiversity activities right HERE.


Spring is a natural time to introduce these topics because students can observe these phenomena, or the by-products of these phenomena, in nature. They can see the honeybees pollinating plants. They can see the flowers growing. They can see the seeds being dispersed. They can see new life around them. Spring science experiments and Spring science activities can be engaging and meaningful, especially when we allow students to get out and explore!

Pin me for later!

Pollination Activities for Elementary Science

When we think of warm weather, we generally think about sunglasses, flip flops, sun, flowers blooming and the promise of summer days at the lake. And as a teacher, I also start to think about how those beautiful blooms came to be…enter pollination!

So how exactly does pollination work and why is it important? As spring approaches, we have a great opportunity to get outside and teach our students all about the fascinating phenomenon of nature. So let’s take a look at pollination.

Why is pollination so important? Science lessons for 2nd grade.

How Does Pollination Work?

Two worksheets, "Insect Pollination" and "Parts of a Flower" are displayed near  magnifying glass.

Worksheets to help students understand how pollination works. Both can be found in the Pollination Spring STEM activities.

Pollination is how pollen transfers from one plant to another. This is largely done by the work of bees or other insects.

The insect lands on the flower to drink nectar. In the process, pollen from the anther (the male part of the plant) sticks to the insect’s body. When the insect travels to a new plant, pollen transfers to the stigma (the female part of the plant). This is necessary for seed production.

Did you know that one bee can pollinate up to 100 flowers in just one trip from the hive? Just think about what a whole colony of bees can accomplish in a day!

Why is Pollination Important?

Pollination is an essential part of growing food. Without pollination, seeds cannot be produced. Thus, fruits and vegetables wouldn’t be able to grow. And as a result, we wouldn’t have as much healthy food available to eat. 

The Easy Way to Teach About Pollination

Looking for a FAST and FUN way to teach about pollination that includes nonfiction reading, comprehension, and a STEM challenge?

Click and print. Planning really is that easy.

Pollination Videos for Kids

There are plenty of engaging ways to teach elementary students about pollination. First, let’s check out some YouTube videos:

  1. As always, I’m a huge fan of SciShow Kids! Check out this awesome video called “Flowers and Their Pollinators: A Perfect Match!”

  2. Dr. Binocs gives a VERY detailed overview. In this animated video, Dr. Binocs goes into depth describing the male and female reproductive parts of plants. He also describes how pollination happens through self-pollination and cross-pollination. 

  3. In this video Jovanna interviews Dr. John Purdy. Together they answer an important question: Why do we Need Bees

Take a Peek at pollination outside!

While studying nature, why not go outside and get right in it? On a nice day, head outside to see pollination in person. Go on an outdoor walk in the springtime and look for pollinators in action.

Have students make observations about what they are witnessing. Not only is this a fun activity that activates their detective skills, it also helps kids to see the value of animals that pollinate. Bees and insects are not just pests, they have an important job to do!

Nonfiction Reading Activity

What are Pollinators” is a set of leveled nonfiction reading passages and corresponding reading comprehension booklets.

Nonfiction reading all about pollination makes a great quick (and no prep) activity. Print off and photocopy this nonfiction reading passage about pollination. This activity was designed to be an easy way to differentiate your instruction because it has two levels of reading passages and two levels of comprehension booklets.

Busy Bee Game

If your students enjoy running around and being active, play a game of “Busy Bee”. This is a game I invented, but you’ll probably see where I gleaned inspiration for this game.

Place a number of hula hoops on the floor of the gym or in a field. These will be the flowers. Put a number of bean bags into half of the hula hoops. The bean bags are pollen. Students are working together to transfer beanbags to all the hula hoops.

If you want to add an extra challenge, you could add in a time challenge; see if students can complete the task in under 2 minutes! 

Pollination STEM Challenge

A worksheet with a flower in the middle is on a table. There are two small containers of green and pink paint. A popsicle stick with a bumble bee is laying beside them.

Pollination Painting is a great STEM Challenge for second and third grades.

This pollination STEM challenge is super hands-on… plus it’s a great art tie-in. Students will use the materials provided to build a device that transfers paint “pollen” from a station in your classroom to their papers. In the end, you’ll have created a piece of art that will display nicely on a bulletin board!

Students will be given a template of a flower (from this Pollinators STEM activity) and then they’ll have to figure out a way to transfer paint to the flower template.

stick-it-to-me Pollination Experiment

Do your students love doing hands-on experiments? Why not have your students try to discover creative ways to attach various objects to their own bodies! For instance, students might discover that various materials stick better to velcro than others. Or students might discover that some tapes are stronger than others. This little experiment is a fun jumping point for discussing how pollen sticks to insects.

Pollination is an important part of nature. And it’s an exciting topic to teach our students. What pollination activities are you going to use to teach your students? 

Pin me for later!

Lessons about pollination for 2nd grade. Picture: a bee sits on top of a white flower.

Lessons about pollination for 2nd grade.
Picture: a bee sits on top of a white flower.

How Seeds Disperse - Elementary Science Activities

Have you ever seen a chipmunk running around with food in its cheeks? Or come upon a buried stash of acorns? These are not just fun discoveries, they are examples of seed dispersal in action! Teaching students about how seeds are dispersed is such a fun science topic, and there are some interesting/interactive ways to teach how seeds spread.

Text reads : All about seed dispersal, activities and experiments for elementary science. Picture is a seed packet and sprout on a blue background.

All About Seed Dispersal: Activities and Experiments for Elementary Science

How do seeds disperse?

Let’s take a quick look at what seed dispersal is. Essentially, seed dispersal is the way that seeds spread around so plants can grow in new areas. Without seed dispersal, plants would be stuck growing in the same place season after season and the seeds would also be competing with each other for the resources needed to survive. Seed dispersal allows plants to find new locations to grow and thrive.

seed dispersal examples

There are five main ways that seeds spread: animals, wind, water, explosion, and fire. Here are a few examples:

  • Seeds get stuck on a dog’s fur and as the dog walks around, the seeds drop into new areas.

  • Seeds get eaten by a bird. The bird flies away and…how do I put this delicately?...poops on something. There are seeds in the bird’s droppings and the seeds grow in a new location.

  • Have you ever heard the term “squirrel away”? Well, squirrels store food for the winter and often bury a cache of seeds and nuts, which can lead to plants growing in new areas.

  • The wind carries seeds to new locations

  • Water lilies and coconuts rely on water to spread their seeds.

  • Eucalyptus plants have seeds with a protective layer that needs to be melted away by fire before it can grow. 

  • And some plants, like violets, will eject seeds to disperse them.

Seed Dispersal YouTube Videos

Videos are a great way to create excitement when introducing a new topic, and YouTube has a handful of really great ones about seed dispersal. Youtube videos.

Here are some fun videos about how seeds spread:

  1. This SciShow Kids video introduces students to the question “How do Plant Seeds Travel?” The video also shows the structure of seeds and how this helps seeds spread. For example, burs have little hooks on them which allows these seeds to stick to animal fur.

  2. This is a fantastic video of Maddie who explores the forest searching for seeds. She also explains how seeds get spread.

  3. This is a short one minute video that gives a quick overview. It doesn’t give all the ways for seed dispersal, but it’s a good start if you’re looking for something super quick.

  4. Want to show seed explosion? This video from the Smithsonian shows a great time-lapse of seed dispersal by explosion.

Nonfiction reading and worksheets

Using nonfiction reading in a science class is a great way to meet multiple standards in the same lesson! 

In this STEM and Reading lesson set, students read a passage entitled “How Did That Grow There?” Afterward, students complete a worksheet about what they read. This not only helps to develop comprehension skills, but it also allows them to solidify the information they just read.

Then I have students create a comic that shows a seed’s journey to a new location using one of the seed dispersal methods from the passage (I took this word for word from the project description…). This gives students a creative outlet for deepening their knowledge!

Need to differentiate? I have a 2nd set of nonfiction reading passages about seed dispersal that comes in two text levels AND two comprehension levels. It’s easy to mix and match to make the assignment work for your class.

seed dispersal stem challenge

Getting hands-on with a STEM challenge is one of the best ways to explore how seeds spread. In this activity, students will create a seed dispersal device.

Using miscellaneous crafting supplies like egg cartons, pipe cleaners, and rubber bands, students will be tasked with creating a device that will spread seeds over a distance (not just dump them in a single location).

Make sure to allow students time to plan and test their devices as well. Not only does this activity teach students about seed dispersal, but it also allows them to practice other skills like design, cooperation, communication, and revising.

float vs. fly

For another hands-on activity, try conducting an experiment about which seeds float and fly. Give your students a variety of seeds. Have stations set up with straws and bowls of water. Students can use the straw to blow the seeds to see which will fly away and they can place the seeds in the water to see which seeds will float.

Take a neighborhood walk

If you’re looking to get out in nature and your students are prepared to get a little dirty, you can do a nature walk. However, before going, give students socks to slip over their shoes. Then have students walk around. When you’ve completed the walk, have students remove the socks and check out what might be attached. Maybe they will find some seeds on the socks!

These are just a few activities to teach how seeds spread. The topic of seed dispersal can be engaging and exciting. It’s a necessary part of nature and we have the privilege of helping out students marvel at the wonder of this natural phenomenon.

Pin me for later!

Lessons about how seeds are dispersed for elementary science. Picture: a chipmunk sits on top of a sunflower with cheeks full of seeds.

Lessons about how seeds are dispersed for elementary science. Picture: a chipmunk sits on top of a sunflower with cheeks full of seeds.

What Do Plants Need to Survive?

I’m not a plant person. I’m just not. I know in my head what plants need to survive, but I just can’t seem to put it into practice. In my living room I have a single IKEA potted plant that, by some miracle, has survived over the years. But it’s the only plant I’ve been able to keep alive for more than a few months. My thumb is not green. But my classrooms? Those are a different story. It turns out with the help of 25-30 8-year-olds I’m practically Joanna Gaines.

What do plants need to survive? Activities and experiments for elementary science. Picture: orange and yellow tulips.

What do plants need to survive? Activities and experiments for elementary science. Picture: orange and yellow tulips.

It turns out that third graders absolutely love tending to plants. And there’s really no better way to explore what plants need to survive than actually planting and growing them. It’s one of the cheapest hands-on science projects that we do.

What do plants need to survive?

To survive, all plants need sunlight, water, air, food (nutrients from good soil), and the right temperature . However, I rarely give students this information at the start of our plant study. Growing plants is such a straightforward inquiry opportunity.  We start with the guiding question “What do we think plants need to survive” and then jump off from there.

Plants Inquiry

I am a HUGE fan of inquiry-based learning, and plant survival is a great topic for guided or student-led inquiry. This inquiry-based science blog breaks down HOW we use inquiry in a plant unit. I love seeing the questions students have about plants and plant growth.


Growing Plants in the Classroom

It’s surprisingly easy (and inexpensive!) to grow plants in the classroom, and it’s always a big hit! Tip: do the planting outside on the field or basketball court. The planting process can get a little dirty!

Things you’ll need:

  • Soil (I grab a few bags of potting soil from Home Depot)

  • Clear plastic cups

  • Seeds (Beans and sunflowers work great!)

  • A water spray bottle

A student write down observations about how their bean plant is growing.

A student writes down observations about how their bean plant is growing.

Give each student a clear plastic cup. Clear works best because it allows students to observe root growth. Fill the cup 4/5 full with soil and pat down. Create a small hole in the top of the soil. I’ve always just had students poke their finger in to create this! Insert the seed and cover it up.

For watering, use a spray bottle. It’s easy to over-water such a small cup of soil, so I try to encourage students to water the plants with 4-5 ‘sprays’ of water. Then, set the cups near a window.

No windows in your classroom? Try taking your plants for a walk, setting them outside for the day, and bringing them back in before the end of the day.

Use a plant observation journal (like the one here) to record observations as the plants grow. It can be found in my Plant Growth and Changes unit (which also includes 3 more plant-related experiments!)

Reading about what plants need to survive

This set of nonfiction reading passages “What Do Plants Need to Survive?” is a great way to integrate informational text and reading skills into a science unit… plus it’s differentiated. Choose from two levels of informational text and two levels of reading comprehension.

Experiment: Why do plants need sunlight?

One of my favorite experiments to teach about plant needs is a simple whole-class experiment that can be done while you are growing your own plants in the classroom.

For this experiment, you’ll need two identical classroom plants (I always grow beans). I set up this experiment while our class is growing beans together. Set aside 2 plants in your classroom. Give identical amounts of soil, water, and seeds from the same packet. Place one plant near the window, and place a paper bag over the other plant. Care for each plant identically. As the plants grow, observe what happens to the plant without direct sunlight. The teaching instructions and student observation journals can be found here!

Pin me for later!

3rd Grade Science Topics Activities and Ideas

I think that the 3rd grade science standards are my favorite. Shh… don’t tell 2nd grade! By the time students are in 3rd, they’re ready to dive a little deeper and be a little more independent in STEM activities. They’ve (hopefully) learned foundational skills like how to create a diagram or complete a STEM challenge, and now they’re ready for something a little more challenging. In 3rd grade science (especially using the Next Generation Science Standards) there is so much opportunity for hands-on activities and experiments. 

For those more longtime blog readers, you probably already know how much I value integrating science with other content areas (like reading!) and allowing opportunities for inquiry and student-led learning. The topics in 3rd grade science are perfect for things like this! They’re interesting, and open-ended enough to allow you to choose subtopics that really interest your class.

do you use science worksheets?

I truly believe that science should be a hands-on experience. However… there is a place for print based activities (worksheets) in science. I usually start a new science unit with nonfiction reading that directly relates to the topic. I find that when students are given a chance to interact with nonfiction texts and reading comprehension that it gives them a solid foundation to move on to experiments and STEM challenges in that subject area. Each of the subjects below also includes a link to nonfiction reading about that topic, and it’s one of the ways we find success in science.

What do you teach in 3rd grade science?

There is SO much to learn in 3rd grade science, and it’s such a perfect mix of hands-on experiments, intriguing research and new ideas! If you’re using the 3rd Grade Next Generation Science Standards (NGSS), then you’re studying…

  • Molecules to Organisms: Structures and Processes - The life cycles of different animals and flowering plants. Comparing and contrasting different life cycles.

  • Ecosystems: Interactions, Energy, and Dynamics - How do some animals form groups to survive? 

  • Heredity: Inheritance and Variation of Traits - Plants and animals have traits inherited from their genetic parents. Some traits can be influenced by the environment. 

  • Biological Evolution: Unity and Diversity - Gathering information from fossils, animal characteristics can provide advantages for survival, surviving in a particular environment, how environmental changes affect animals and plants

  • Earth’s Systems - Using tables and graphs to display typical weather patterns, climates in different regions of the world

  • Earth and Human Activity - Reducing the impact of a weather-related hazard

  • Motion and Stability - the effects of balanced and unbalanced forces, predicting motion, magnets

STEM Activities and Nonfiction Reading for Every NGSS topic

The EASY button for your 3rd grade science lessons. Two paired passages about each topic, scripted instructions and a hands-on STEM activity.

Click and print. Planning is that easy.

Let’s dive in to some of the best science lessons for each 3rd grade NGSS topic!

Life Cycles of Living Things

There are so many ways to get hands-on when you are learning about life cycles. I always start by narrowing down this unit to one or two animals and/or plants. Once you look at one life cycle in depth, it’s easier to compare and contrast it to others.

In the past I’ve looked at butterflies (and hatched them!), salmon, penguins, beans (and grown them), sunflowers, and dolphins!

Ask your students which life cycles they are passionate about and go from there! Some of my favorite activities and projects for life cycles are here in this post.  


why do some animals live in grous?

So many animals survive in groups! This animal groups post breaks down ways to explore the animals that live in a group, and the advantages that this can provide. It also includes a free activity where students sort animals into two categories: ‘live in groups’ and ‘live solitary’. 


Teaching Kids About Inherited Traits

Why do animals look like their parents? Do plants even have parents? ‘Inherited Traits’ are traits passed down parent to offspring, and are traits an organism has from birth. There are so many fun ways to learn about inherited traits during 3rd grade science. The play-doh activity is one of my favorites!

This ‘teaching inherited traits’ post specifically looks at inherited traits in animals and plants, so it’s perfect for classrooms that don’t want to touch on inherited traits in humans (this can be a tricky topic when families are created in so many different ways!). 


Fossil Activities for Kids

Fossils are the preserved remains of plants and animals that turn into stone over a long period of time. But what information can we gather as we look at these fossils?

This post breaks down my four favorite activities when teaching 3rd grade students about fossils and includes a fossil making activity that is so much fun.  

https://www.poetprints.ca/blog/4-lessons-about-fossils-for-3rd-grade 


Animal Adaptations

Adaptations help animals to survive in their environment. Have you ever seen an animal that camouflages into their environment? This is an adaptation! Animals are uniquely adapted to their own environment.

Take a peek at this animal adaptations blog for some of the best videos, projects, experiments, and nonfiction reading all about how animals adapt to their environment. 


Changes in the Environment

Our environment is constantly changing, and it affects the plants and animals that live there. There are so many different topics you can look at when exploring changes in the environment: deforestation, urbanization, pollution, garbage collection, and more.

This post about changes in the environment specifically looks at how ocean pollution and litter negatively affect an environment… and what we can do to help!  


Weather Related Hazards

This 3rd grade science topic is broad because there are SO many different weather related hazards.

This topic can be taught  as an overview where you look at a variety of weather related hazards, or in a more narrow approach where you focus on a single hazard (like blizzards or hurricanes). Students will research and design a solution to weather-related hazards.

I suggest keeping this topic local. Which hazards can affect your community? Where do you students have real-life connections to a weather related hazard? Start there! 

I’ve rounded up some of the best videos, projects and ideas for teaching weather related hazards over here.


Weather vs. Climate

What’s the difference between weather and climate?

Climate is what you expect, and weather is what you get! Weather changes from day to day and climate is the long term patterns of weather in a particular area.

There are so many different ways to explore weather and climate, and this post breaks down the best ideas for teaching about weather and climate in 3rd grade science. Don’t miss the weather journal that asks students to track and graph the weather outside your classroom - no supplies required! 


Forces and Motion activites for kids

Force and motion is the ultimate hands-on unit in 3rd grade. The topics absolutely begs to be taught with experiments and STEM challenges… so we do!

I have found that the best way for students to understand push vs. pull, balanced and unbalanced forces, friction, static electricity (and more!) is to see them in action! The experiments in this post are designed to help students get familiar with forces and explore them firsthand.

This is the post you need to teach force and motion - don’t miss the magnet maze freebie!


lessons and experiments with magnets

Magnets are materials with a magnetic field that draws objects to the magnet itself.. and there are so many fun experiments that use magnets.

Lessons on magnets are a big part of our force and motion unit, but I’ve put it here separately because sometimes we teach them one after the other.

This post looks at magnets in real life, nonfiction reading, and hands on STEM challenges. 


Third grade science is a blast! It’s a great time to plan for science units that are full of experiments and STEM challenges. I try to limit the amount of worksheets we use during science time… but I do find that integrating science-based nonfiction reading and comprehension can give students the background knowledge they need to complete an experiment. 

Need print and go 3rd Grade Science lessons that include nonfiction reading and STEM extensions?

Back to School Science Lessons for Third Grade

Third grade science is SO much fun. The experiments, the hands-on activities… the LEARNING! Setting students up for success is so important in science. Students will have the skills necessary to make hands-on science SO successful with a few targeted lessons. These back to school science lessons are key for the beginning of Third Grade. 

What is a Scientist?

This is one of the first science questions we should be asking our students at the beginning of the year. A scientist is a person who conducts research to further knowledge in a particular area. I sometimes get the sense that our students might think scientists are people who only blow things up and only do science experiments.

So we teach them the importance of research when it comes to doing science. It’s not all “fun and games”(ie. Explosions and experiments). There is a research and observation component as well. 

I also like to touch on the idea of peer-review when it comes to scientific research. Peer review is the process that scientific discoveries and research go through. Other scientists check or recreate the experiments or research to see if they can verify the discoveries. I like teaching this aspect because it gives students a better idea of the entire research process.

In this post, I break down some of the most engaging ways to introduce students to the scientists behind the most important discoveries in the world. Plus, it has a FREE ‘Science Trading Card’ activity that’s just so much fun.

How to Label a Diagram

Diagrams are so helpful for illustrating things in science. And there are a few key components of a scientific diagram, such as a title, labels, and label lines. There are ways to do each of these things in order to meet the specifications of a scientific diagram. 

Diagram labeling will involve both quantitative and qualitative observations, so we will also have to teach students to distinguish between these two types of observations.

Explicitly teaching our students how to make observations and create a scientific diagram will set them up for success, both in third-grade science and upper-level science. Just think about how impressed their high school science teachers will be!

How to Successfully Complete a STEM Challenge

STEM Challenges are so fun to do in third grade and are a great way to challenge students to use their creative and critical thinking to solve problems! But, we can’t expect them to know exactly what to do without some explicit teaching. So at the beginning of third grade, I always teach students how to successfully complete a STEM challenge. 

I’ve outlined my process for teaching STEM Challenges here, and you can also read about my 4 favorite STEM activities that use few or inexpensive supplies.


Teaching the Scientific Method

Science experiments are such an important part of any science class, and any experiment or STEM challenge is rooted in the scientific method. It is so important that students understand the steps in the scientific method so that they are ready to conduct scientific inquiries in and out of the classroom.

Taking time to teach terminology like hypothesis, procedure, results, conclusion, etc. will give students the vocabulary they need in any science classroom.


Science has the ability to create wonder and excitement in the classroom. So let’s set our students up for success by teaching these introductory science lessons before delving into the curricular topics.

How To Complete a STEM Challenge

Have you ever stopped to think about all the things we explicitly teach our students throughout the school year? At the beginning of the year, we review classroom routines. We also teach academics like math and writing. We make sure our students have problem-solving strategies and interpersonal skills. There is so much that goes on in our classroom! One of the science lessons I always teach my students is HOW to complete a STEM Challenge. STEM challenges are such a big part of our classroom, but I want to make sure that students have the tools to complete them successfully.

Why do we have to teach kids to complete a STEM challenge?

Well, for starters, we need to teach our students this skill so they know the expectations of STEM activities. How many times have we given our students an activity that we think will take thirty minutes and two students come to you after thirty SECONDS saying they're done! 

I realized pretty quickly that stating my expectations goes a long way so students can complete activities more successfully. Also, I find teaching students this skill helps my more timid learners come out of their shells. They are able to picture what to do because they saw a demonstration, so they don’t feel as anxious about doing something “wrong” when doing a STEM challenge for themselves.

First: Model a Stem Challenge

A Force and Motion STEM challenge

The very first STEM challenge of each year is done as a teacher-led challenge that we complete as a group. (Then we move on to student-led learning!)

I model each step for the students and I verbalize my thinking so my students can get a better sense of my problem-solving and creativity as the STEM challenge unfolds.

Hmmm… what is this challenge asking me?

What materials do I have? Let’s be specific when I write them down

WAIT! I should stop and write down what I’m doing right now.

Yikes! This didn’t work, what should we try next?

It’s important to show students my thought process behind how I problem solve and critically think about the challenge. This is also a great time to model how to complete any reflection or worksheet pages that go along with your STEM challenges.

reading carefully

It’s important to teach students how to read instructions carefully. Are they sure they know what they are doing? Are they sure they know what the challenge is? What materials are being used? I model how to check back on the instructions periodically throughout the challenge. I want my students to feel comfortable with double-checking what they are to be doing.

Wow! I think this worked. Let’s check back to the instructions to make sure we didn’t miss anything.

take good notes

Teaching students to take good notes is essential. This means teaching students how to take notes as they go - not just taking notes at the beginning or at the end.

Okay, we have our materials out. Let’s write them down before we move on to the next step!

This includes writing in full sentences and making quantitative observations. Quantitative observations involve number measurements, like height, temperature, width, etc. Scientific notes should be specific enough that anyone can repeat the challenge just by reading our notes!

Hmm, I wrote down “add some water” but that isn’t specific enough. How will anyone know how much water to use! I’ll change it to ‘add 5mL of water’ so everyone knows exactly what to do.

Teach how to label a diagram

LINK to DIAGRAM BLOG and pic from diagram blog

We also need to model and teach our students how to correctly label a diagram. Again, this includes using quantitative AND qualitative observations. Qualitative observations use the five senses, so they might include things like texture, shape, and smell. Teaching how to label a diagram also includes explicitly teaching how to title, label and annotate, draw lines, and add a scale (if you want to get really fancy). You can read more about how to teach students to label a diagram here.


expect failure

A poster is held up. It has a rainbow at the top and reads "It's okay to not know. It's not okay to not try."

All of these above teaching points are important, but I also think we need to expect failure. And not only that, we need to teach our students to expect failure. Some of the greatest scientists failed all the time. Thomas Edison, maybe one of the most well-known inventors/scientists, had over a thousand failed attempts before successfully inventing the lightbulb! And one of his most famous sayings is “Many of life's failures are people who did not realize how close they were to success when they gave up.”

The goal of a STEM challenge or science experiment is not to find the “right answer” every time. Students will OFTEN have to change something and try again. Having a growth mindset is incredibly important in science. 

growth mindset books that are perfect for science:

So, when it comes to teaching, there are many things that we aim to teach our students: critical thinking, problem-solving, organization, reading fluency….the list is always growing. And I’d venture to say that explicitly teaching our students how to complete STEM challenges is important as well. There are several things to teach when it comes to completing STEM challenges. So let’s set our students up for better success by modeling, demonstrating and explicitly teaching this skill.

How to Label a Scientific Diagram for Kids

In Science, we have the opportunity to teach our students many things: how to conduct an experiment using the scientific method, how to research, how to make hypotheses, and how to form scientific questions. Another thing we have the opportunity to teach is how to properly create and label a scientific diagram. There are many opportunities to use scientific diagrams in 2nd, 3rd and 4th grade, so let’s set our students up for success and teach them how to properly create a scientific diagram.

How To Label a Diagram is displayed over top of drawing supplies on a table

SO much of science needs a diagram to help illustrate an idea. You might need to create a proper diagram in situations like…

Creating a diagram is such an important skill to teach at the beginning of the year so that students are ready to add more details as the year progresses. 

Why do we need to teach students to create diagrams for science?

Explicitly teaching our students different skills in science is important because not everything will come intuitively. Science involves accurate observations and this can be tricky to capture in a diagram, so it’s best that we teach our students how to create diagrams so they know exactly what the expectations are.

What Should a Scientific Diagram Include?

There are a few key components of a scientific diagram. You will need:

  • A title at the top center of the page with a description of what is in the drawing. 

    • For example, if you are drawing a pumpkin seed, do not simply write “Seed”, write “Pumpkin Seed”. If you are drawing a picture of the Water Cycle, do not write “Water” write “Water Cycle”

  • A clear, colored picture of the item

  • Labels and annotations 

    • Generally, the labels go on the right-hand side of the diagram, but there can be exceptions to this rule

  • Label lines without arrows

    • Make sure to use a ruler when creating your label lines so all the lines are straight

    • The lines should not cross over each other

  • Scale

    • This is if you are drawing something larger than it is in real life (if you want to get really fancy with your elementary school students)

facts vs. opinions

Knowing the difference between a fact and an opinion can really help with creating a diagram.“The plant looks pretty” is an opinion. This isn’t something that we can measure and it might change from person to person.

qualitative vs. quantitative observations

A poster about Types of Observations, qualitative and quantitative, is displayed on a table

Types of Observations reference guide - available as a free download on this page.

One of the first steps is to teach our students the difference between qualitative and quantitative observations. Qualitative observations and things that we use our senses to observe.

  • The coffee feels hot. The coffee is dark brown. The coffee tastes bitter.

These are things we use the senses to observe.

Quantitative, on the other hand, are observations that include numerical measurements.

  • There are 10 ounces of coffee in the mug. The coffee is 195F degrees. 

Teaching Qualitative Observations

When teaching qualitative observations, it’s time to do a solid review of the five senses. I love making popcorn when reviewing the senses because making popcorn involves all the senses: smell, sight, hearing, touch and taste! But we also need to get more specific when teaching about qualitative observations. Here are some things we can teach:

  • Texture

  • Shape

  • Color

  • Temperature (If you are describing temperature using adjectives like hot and cold, and not describing it using a thermometer number)

Teaching Quantitative Observations (Numerical Measurements)

This is where measuring skills really come in handy. First, we need to give our students practice in how to measure things using a ruler. Then we should give them practice with how to weigh things on various types of scales. These two things lend themselves naturally to some great hands-on lessons! Who doesn’t love measuring and weighing classroom objects!

Teach students different types of quantitative measurements:

  • Height

  • Width

  • Weight/Mass

  • Number of specific parts (ie 2 eyes, 8 petals, 4 leaves, etc)

Labeling the Diagram

Now that our students know what kinds of things we should be observing for our scientific diagram, it’s time to start creating diagrams. Together, label an example and a non-example of the same object. This is a great way to teach students expectations for when they create their own diagrams. 

Next, have students practice their observation skills. They can create diagrams of classroom objects and toys! 


Science provides so many opportunities to create diagrams. Let’s set our students up for success by teaching them how to properly create and label these diagrams. Their upper grade teachers will be impressed when they come to class already having had ample practice with the concept!

Teach Students to How to Label a Diagram Scientifically
What Is a Scientist For Kids

Have you ever stopped to ask yourself or your students “What is a scientist? What characteristics and skills does a scientist need?” It’s an important conversation to have with our students. Why do we need to teach them the qualities of a scientist? All students can be scientists, but what do scientists do? Let’s take a closer look at what a scientist is and how we can create scientists in our classrooms.

in simple words, what is a scientist?

Nonfiction reading titled "What is a Scientist" is displayed next to reading comprehension questions.

Nonfiction reading: “What is a Scientist?” - available as a free download!

A scientist is a person who conducts research to gain more knowledge in a particular area.

There are scientists in a variety of fields: biology, physics, marine biology, zoology, you name it! Scientists are NOT someone who just “knows” things or “guesses” answers. Scientists research!

why is peer-review so important?

Scientific discoveries and research go through a process called peer-review. This is when other scientists check or recreate the experiments and research that was done. Peer-review is a great way to ensure that the discoveries and research are correct.

Imagine that you conducted an experiment where you roll a ball down the hallway to see the path it takes. Your ball curves towards the left. You determine that all balls curve to the left when they are rolled down hallways.

THIS is where the peer-review process will come in. A group of scientists will try to replicate your findings and poke holes in your method. Eventually, they will see that balls don’t only roll to the left…I think you get the picture.

Scientists play an important role when it comes to discoveries and research. Scientists discovered the concept of gravity, they investigated space, and they invented the internet. Scientists also discover new medications and healthcare technology. Scientists study animal behavior and research the best ways to care for the environment. Scientists are researching and making discoveries on a regular basis. They play an important role in our society.

Ideas for Teaching Students about Scientists

We should be teaching our students what a scientist is, so they don’t have misconceptions moving forward. Learning about scientists is also a great way to expose students to the different careers they could have in STEM fields. Maybe one of our students will make the next greatest scientific discovery when they get older!

So here are some ideas to help teach our students about scientists:

Brainstorm About Scientists

It’s always fun to brainstorm with students about what they already know. A classic KWL (Know, Wonder, Learn) chart is a great way to start. Have students discuss and brainstorm what they already know. Then look up what they think they know to make sure it’s correct. This will help to demonstrate the research and “peer-review” aspect of science!

Research a Scientist

Pages for researching famous scientists are laid out on a table.

Have students research famous scientists (both from history and current scientists). Each student can do a little research on a specific scientist and create a ‘Scientist Trading Card’ to share with the class. This is such a great way to expose students to the many different people who have made a BIG difference in our world.


Here are some ideas of scientists your students could research:

A list of famous scientists is displayed on a clipboard.
  • Isaac Newton

  • Thomas Edison

  • Albert Einstein

  • Marie Curie

  • Charles Darwin

  • Stephen Hawking

  • Rachel Carson

  • Jane Goodall 

  • Mary Anning 

  • Bill Gates

  • George Washington Carver 

These are just a few names of famous scientists. There are lists upon lists of famous scientists that can be found on the internet, just a short Google Search away.

Build on students’ curiosities

After doing some introductory work about what a scientist is, you can have your students put their new knowledge into practice. This might be a great time to introduce Genius Hour. Have students pick a topic they are interested in and let them research and explore the topic!


Learning about scientists and the characteristics of a scientist might just be a key to helping our students better connect with science. Maybe one of our students will be the next to uncover something amazing in the scientific world!

Pin Me For Later!

Animals That Live in Groups - Third Grade Science

There is something about animals that fascinates children of all ages. Let’s be real, even adults are fascinated by animals! Whether it’s learning about why zebras have stripes or learning about how to classify animals, kids are drawn into the world of animals. Some animals survive by living in a group. Working together helps in so many ways. Take a peek at some of the best ways to learn about why some animals live in groups!

'Why Do Some Animals Form Groups to Survive' - A pride of lions is pictured at the bottom.

Why do animals live in groups?

Animals live in groups to help each other survive. Animals can hunt together, protect each other and help raise their young. A lone lion would have to do a lot of work in order to survive, but a pride can work together to thrive. One honeybee isn’t going to be able to survive alone, but a hive full of bees can thrive. 

What kinds of animals live in groups?

Some animals do thrive alone, like robins or polar bears. Other animals live in groups. Some of these animals include gorillas, bats, honey bees, deer, buffalo and lions. 

Teach About Animal Groups with One Click!

Looking for a FAST way to plan out your animal groups unit that already includes paired nonfiction passages? In just a few clicks you can grab all of the pieces you need: lesson plans, paired passages, reading comprehension, key reading skills, and a fun science project.

Click and print. Planning is really that easy.


teach the importance of animal groups with a video

When putting together any Science unit, I like to have a few good YouTube videos on hand. I find that videos are great for introducing concepts or reviewing concepts. They also help to break up the teaching time. So here are a couple youtube videos I found about Animal Groups:

  1. https://www.youtube.com/watch?v=gwH8xGmqGmo - I love a good SciShow Kids video and so do the students.

  2. https://www.youtube.com/watch?v=r2_npLl4Cyc - This video answers the question “Why do animals live in groups?”

Reading Passages

Reading passages about how bees and lions survive in groups

Reading Passages all about two animals who form groups to survive.

Combining science with reading is a great way to sprinkle in some informational text and reading comprehension. In these passages, we explore two different animals that form groups to survive. ‘Busy Bees in Action’ is a reading passage all about how honeybees work together and ‘Fierce Savanna Predators’ is a reading passage all about how lions work as a team to survive. While reading these passages, student get a good overview of the jobs each member of the pride or hive is responsible for.


Lone Lion Tag

A great way to demonstrate the power of teamwork is by playing a game of tag. In the first round, have one student (the “lone lion”) try to catch as many of their classmates (“the prey”) as possible. In the second round, have a group of students (“the pride”) try to catch as many students as possible. Your students will quickly see that working together as a team gives better results. In the same way, animals work together to get better results.

Animal Groups Science Project

Animal Group Spinners are fun to make with your students. Photocopy templates for your class so each student can choose the animal they would like to write about. Students then research either bees or lions. They can gather facts about their animals. They write these facts into the spinner template. This is a fun way to have students research and write. I especially like this activity because they don’t have to write in the traditional paragraph form.

animal groups sorting activity

If your students are extra interested and engaged in this topic, you can have students do some additional research about animals that live in groups. This sorting activity and research template is such a great way to help students discover which animals live in groups, and which prefer a more solitary life.


There are so many activities you can do to teach your students about animals. And I’m just scratching the surface! You’re probably already thinking of an idea or two. Teaching students about animals that live in groups can be exciting and engaging.

Pin Me For Later!