Posts tagged STEM
How To Complete a STEM Challenge

Have you ever stopped to think about all the things we explicitly teach our students throughout the school year? At the beginning of the year, we review classroom routines. We also teach academics like math and writing. We make sure our students have problem-solving strategies and interpersonal skills. There is so much that goes on in our classroom! One of the science lessons I always teach my students is HOW to complete a STEM Challenge. STEM challenges are such a big part of our classroom, but I want to make sure that students have the tools to complete them successfully.

Why do we have to teach kids to complete a STEM challenge?

Well, for starters, we need to teach our students this skill so they know the expectations of STEM activities. How many times have we given our students an activity that we think will take thirty minutes and two students come to you after thirty SECONDS saying they're done! 

I realized pretty quickly that stating my expectations goes a long way so students can complete activities more successfully. Also, I find teaching students this skill helps my more timid learners come out of their shells. They are able to picture what to do because they saw a demonstration, so they don’t feel as anxious about doing something “wrong” when doing a STEM challenge for themselves.

First: Model a Stem Challenge

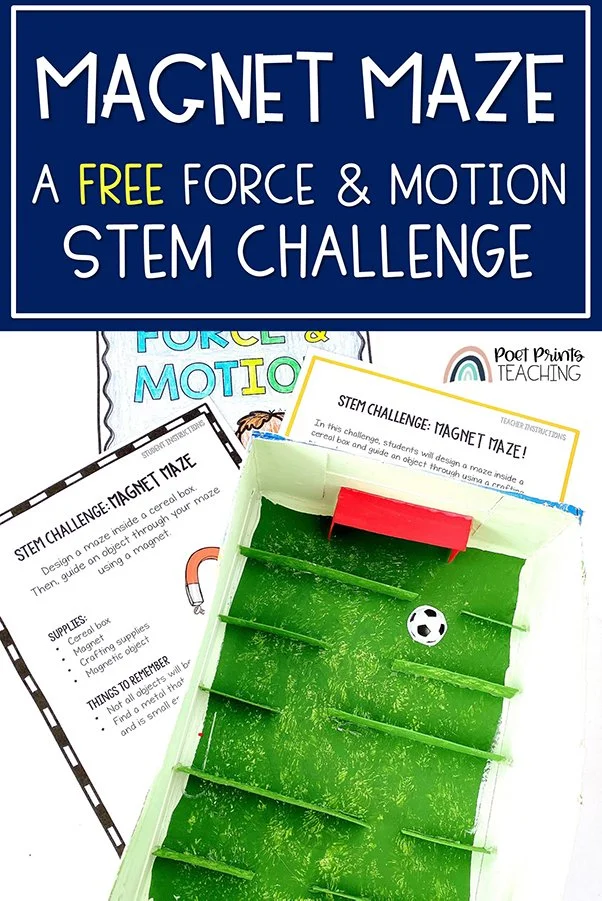
A Force and Motion STEM challenge

The very first STEM challenge of each year is done as a teacher-led challenge that we complete as a group. (Then we move on to student-led learning!)

I model each step for the students and I verbalize my thinking so my students can get a better sense of my problem-solving and creativity as the STEM challenge unfolds.

Hmmm… what is this challenge asking me?

What materials do I have? Let’s be specific when I write them down

WAIT! I should stop and write down what I’m doing right now.

Yikes! This didn’t work, what should we try next?

It’s important to show students my thought process behind how I problem solve and critically think about the challenge. This is also a great time to model how to complete any reflection or worksheet pages that go along with your STEM challenges.

reading carefully

It’s important to teach students how to read instructions carefully. Are they sure they know what they are doing? Are they sure they know what the challenge is? What materials are being used? I model how to check back on the instructions periodically throughout the challenge. I want my students to feel comfortable with double-checking what they are to be doing.

Wow! I think this worked. Let’s check back to the instructions to make sure we didn’t miss anything.

take good notes

Teaching students to take good notes is essential. This means teaching students how to take notes as they go - not just taking notes at the beginning or at the end.

Okay, we have our materials out. Let’s write them down before we move on to the next step!

This includes writing in full sentences and making quantitative observations. Quantitative observations involve number measurements, like height, temperature, width, etc. Scientific notes should be specific enough that anyone can repeat the challenge just by reading our notes!

Hmm, I wrote down “add some water” but that isn’t specific enough. How will anyone know how much water to use! I’ll change it to ‘add 5mL of water’ so everyone knows exactly what to do.

Teach how to label a diagram

LINK to DIAGRAM BLOG and pic from diagram blog

We also need to model and teach our students how to correctly label a diagram. Again, this includes using quantitative AND qualitative observations. Qualitative observations use the five senses, so they might include things like texture, shape, and smell. Teaching how to label a diagram also includes explicitly teaching how to title, label and annotate, draw lines, and add a scale (if you want to get really fancy). You can read more about how to teach students to label a diagram here.


expect failure

A poster is held up. It has a rainbow at the top and reads "It's okay to not know. It's not okay to not try."

All of these above teaching points are important, but I also think we need to expect failure. And not only that, we need to teach our students to expect failure. Some of the greatest scientists failed all the time. Thomas Edison, maybe one of the most well-known inventors/scientists, had over a thousand failed attempts before successfully inventing the lightbulb! And one of his most famous sayings is “Many of life's failures are people who did not realize how close they were to success when they gave up.”

The goal of a STEM challenge or science experiment is not to find the “right answer” every time. Students will OFTEN have to change something and try again. Having a growth mindset is incredibly important in science. 

growth mindset books that are perfect for science:

So, when it comes to teaching, there are many things that we aim to teach our students: critical thinking, problem-solving, organization, reading fluency….the list is always growing. And I’d venture to say that explicitly teaching our students how to complete STEM challenges is important as well. There are several things to teach when it comes to completing STEM challenges. So let’s set our students up for better success by modeling, demonstrating and explicitly teaching this skill.

Magnet Activities for 3rd Grade

Opposites attract! Polar opposites! Magnet puns are all over the place. And magnets are all over the place. Chances are, our students have seen magnets on their home refrigerators, in the classroom, holding signs up at some groceries stores…you name it. This is really attractive (see what I did there) for teaching about magnets because many students will have some previous knowledge to help them connect with the topic. There are so many fun and engaging activities that we can use to teach our students about magnets.

How do magnets work?

A magnet is a material that has a magnetic field. A magnetic field is an invisible force that draws objects to a magnet. Magnets pull things made of steel or iron toward them. A magnet has two ends. One end is called the north pole and the other end is called the south pole. There is a magnetic field around each pole. 

Use paired passages about magnets

Informational text articles about Magnets - written at a 3rd grade level. See them here.

Paired passages are a great way to integrate literacy skills and science. I have my students read about magnetism (in general) and then I have them read about junkyard magnets. I find that this helps them get a more well-rounded understanding of magnets. They might not be able to go to the junkyard to see how electromagnets are used, but students can read about it (and then watch a youtube clip about it!) Integrating informational texts into science is a great way to help students develop their vocabulary and comprehension. It’s also good to have students read about a topic alongside doing hands-on activities.

Make a magnet maze

Speaking of, check out this fabulous hands-one magnet maze activity. In this open-ended STEM challenge, students used their creativity and their problem-solving skills to create a maze with a variety of materials. They test out ideas and theories about what will make an amazing maze. And be sure to give students time to test out each other’s mazes. You can grab the activity and lesson plan for this maze challenge here.

make some magnetic slime

How many of your students love slime? Did you know that you can make magnetic slime! It’s as fun as it is educational. You can peek the whole magnetic slime recipe here - it’s a great one for grabbing students’ interest!

magnetic scavenger hunt

Give out a magnet to each of your students and have them wander around the school (both inside and outside) to see how many magnetic objects they can locate. You’ll be surprised about how many things are magnetic: doors, door frames, metal poles, door knobs, fences…. 

While exploring, make sure that students are recording all the magnetic objects they find. When you return to the classroom, have a discussion about why the magnet stuck to some things and not to other things.

Magnet Videos

After doing some hands-on activities, your visual learners might want to sit and watch some clips about magnetism. Here are a few that I found useful. The first two clips are less than five minutes each and give a short introduction to magnets. The last video is a Bill Nye episode all about magnetism. While this show might be from my childhood, our students can still learn tons from Bill Nye!

You can also check out this clip from Dr. Bino’s Show all about magnets and this SciShow for kids episode!

Build a magnet car maze!

I love STEM challenges, especially when they’re open ended. In this magnet car challenge, students have to sketch and build a maze using the materials provided. Then, using only a magnet, they have to navigate a magnetic car through the maze. They cannot use their hands to touch the car! Before students start, have them record the materials they plan to use and the procedure they will use to construct their mazes. Afterwards, have students reflect on what went well and what could have gone better.

If you’re looking for lessons that are completely prepared for you, check out my Reading into Science: Magnets unit. This unit is designed to teach third grade students all about magnets and magnetism. What is a magnetic force? How are magnets used in everyday life? How can we use them to solve problems and have FUN?

Complete lessons plans mean you don’t have to worry about a thing.

Plan Your Magnets Lessons with One Click!

Looking for a FAST way to learn about magnets that already includes paired nonfiction passages? In just a few clicks you can grab all of the pieces you need: lesson plans, paired passages, reading comprehension, key reading skills, and the hands-on magnet maze. Click and print. Planning is really that easy.

Pin me for later!

Weather-Related Hazards - Activities for 3rd Grade Science

I’ve been planning to write this post for a while, but I never thought it would be THIS relevant! Where I live on the West Coast, we have had a ton of rain this season and it’s caused floods in several local areas. So writing about the topic of weather-related hazards is quite relevant for students in my area. How do we teach about weather-related hazards to our students? There are several engaging ways for students to learn about weather-related hazards in third grade.

What are weather-related hazards?

Extreme weather is anything like extreme precipitation, high winds, hurricanes, extreme heat or cold, thunderstorms and lightning. These weather events can cause hazards like flooding, injury, damage to buildings and crops, and even death. There are ways to help prevent these hazards in the community, such as building seawalls, living in wind resistant shelters and having hurricane shelters. There are several ways to engage students in activities to help them learn about extreme weather and weather-related hazards.

Reading about types of extreme weather and natural disasters

Reading passages about weather related hazards.

At the beginning of an extreme weather unit, I like to have my students read about different types of extreme weather. They also read about the weather-related hazards associated with each form of weather. For example, when reading about hurricanes, students will also read about the importance of staying indoors and staying away from doors and windows. 

Before students can begin designing and researching, they first need to understand the different forms of extreme weather. Reading informational text is my favorite way to help build this background knowledge.

Design a weather resistant shelter

Have students build a Wind Resistant Shelter! Grab the plans here.

After students have had a chance to read about extreme weather and weather-related hazards, it’s time to get hands-on! Challenge your students to make a wind resistant shelter. Prepare materials, like tape, glue, popsicle sticks, paper, cardboard, etc, for each student or small group of students. Take time to talk about what you know about stable shelters. Then make a T-chart of characteristics of stable and unstable shelters. 

After students have brainstorms the characteristics of stable and unstable shelters, they get to design their own wind resistant shelter. I like to use a hair dryer as my source of wind! Students really get a kick out of seeing their shelter “attacked” by the hair dryer.

Extreme Weather Research Project

Research solutions to local weather related hazards. Have students identify the answer to questions like:

  • What weather do you see?

  • What ways do people locally reduce impacts? 

  • How do people prepare?

  • How are houses built?

  • How are people warned about extreme weather?

Students love learning about their own neighborhoods, but also let them research other areas of the world as well. For example, do communities in Kansas prepare for high winds differently than communities in Asia? These are interesting research questions for students to look into.

build a bridge

In many areas of the world, heavy rains can affect rivers, which in turn can affect bridges. Similar to the weather resistant shelter, challenge your students to build weather resistant bridges. Have students experiment with materials like sugar cubes, lego pieces, paper, popsicle sticks, etc. Students should build their bridge in a tupperware container. Then pour water into the container to see how the bridge reacts to water. You could even move the tupperware container from side to side to simulate waves.

Different materials will react differently in water. This challenge is open-ended and allows students to use their critical thinking skills.

Extreme Weather Safety Kit

Another great way to learn about weather-related hazards is to learn about how to prepare for them. Each region is prone to different types of extreme weather, but it seems like safety kits are pretty standard no matter which extreme weather we face. Talk to students about items that should be in a safety kit and have students put together a sample.

I’m not talking about a physical sample (unless you have the resources and budget to do this). I’m meaning a paper collage. Have students cut out pictures of things like canned food, water bottles, flashlights, bandaids, etc. Then have students glue these onto their “safety kit”. They can take this home to show their parents. 


If you’re looking for lessons that are completely prepared for you, check out my Reading into Science: Weather Related Hazards unit. This unit is designed to teach third grade students all about 7 different kinds of extreme weather and weather related hazards. What is extreme weather? How can we protect ourselves and our homes from extreme weather? What hazards should we be aware of?

The lesson plans are completed for you so you don’t have to worry about anything.

Plan Your Extreme Weather Lessons with a Click!

Looking for a FAST way to plan out your hazardous weather unit that already includes paired nonfiction passages? In just a few clicks you can grab all of the pieces you need: lesson plans, paired passages, reading comprehension, key reading skills, and a hands-on STEM challenge. Click and print. Planning is really that easy.

Extreme weather, weather-related hazards and weather safety as such important topics to explore with our students. If you have any favorite activities that you use to teach about weather-related hazards in third grade, feel free to let me know!

Pin Me for Later!