Posts in second grade
Water on Earth Activities for Kids

We drink water, cook with water, bathe in water, swim in water, clean with water, etc. I’d say water is pretty important and definitely integral to our lives. Come and explore the wonderful world of water with your students by learning about why water is important on Earth and how much water on the Earth is usable. Plus, check out some water activities you can do at home or in the classroom!

How much water is on Earth?

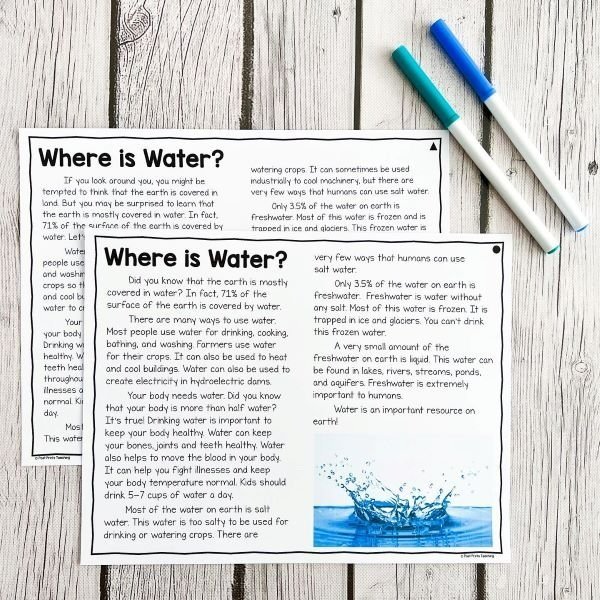
Most of the Earth is covered in water. In fact, 71% of the Earth’s surface is covered by water. But only 3.5% of that water is freshwater and most of this water is frozen!

Why is water important to Earth?

People use water for many reasons, including cleaning, cooking, drinking, and bathing. Water is also essential for growing crops. Many places use water to heat and cool buildings, and it can be used to generate electricity. Plus, drinking water is important for our health. Water is very important!

The EASY Way to Teach Water and the Water Cycle

Learn all about water on earth with this hands-on unit that has everything you need.

Scripted lessons… check!
Vocabulary … check !
Reading passages… check!
Hands-on projects … check!
Engaging? Double check!

Reading about Water on Earth

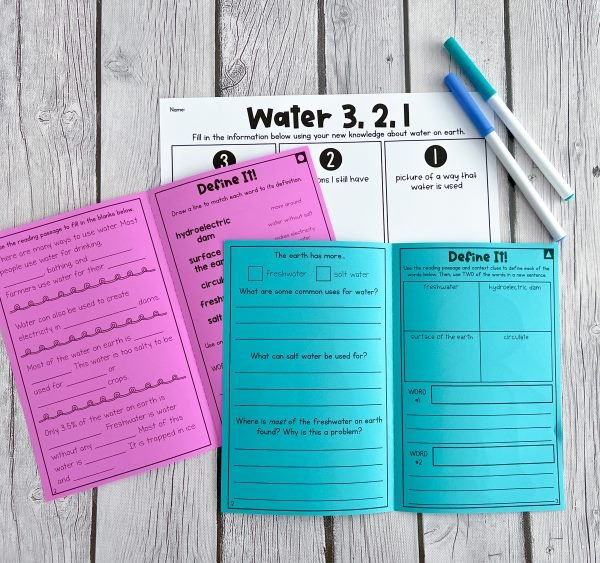
When students are learning a new science topic, it’s helpful to have students read about it. Plus, it integrates reading right into our science lesson! These Water on Earth’ reading passages and comprehension booklets are perfect for this. They’re in two levels so you can differentiate them for your class.

With the passages, students will learn about why water is important. They will also be learning where water is found and the different types of water (ie. freshwater and saltwater). Grab them here!

Group Activity - exploring Sources of Water

Group projects are a great way to have students engage with a topic and also practice skills like teamwork, conversation, problem-solving, and task management.

This Sources of Water group activity is perfect for all of this! Assign each group a water source to research. Each group will become the ‘expert’ on their own source of water, and teach the rest of the class about it. Eventually, the whole class will have compiled a booklet of information about all of the water sources!

The activity can be found in my Water Cycle science unit!

Project: Conserving Water

Conserving Water: a flipbook project based on a guided inquiry question.

To teach about water conservation, a guided inquiry project is a great option!   This flipbook (included in the Water Cycle unit) will have students answering the question “How can we conserve water?” Students can pick their own focus and then do some basic research.

While doing this project, students will look for information about why conserving water is important and they will hunt for solutions to the problems they discover. They will present their information in the flipbook.

Alternatively, students could present their findings in another way: website, a model, a book, a TED talk, etc.

This project (teaching guide, flipbook template, assessment) is a part of the complete Water Cycle Unit.

water cycle bag activity

The Water Cycle Ziploc Bag is an old favorite for many. This water activity is a great way to have students observe the water cycle in action. Simply draw the water cycle on a ziplock back, add some water, seal the bag, and tape the ziplock to a window. After a few days, you’ll be able to see the water in action: evaporation and condensation. Take a detailed look at the activity right on the Ziploc website!

become a water detective

Have children brainstorm ways they can conserve water. Here are a few quick and practical things they might come up with:

  • Turn the tap off while brushing their teeth

  • Put a water saver in the toilet tank

  • Limit time in showers

  • Instead of dumping undrunk water down the sink, use it to water plants

  • Rewear clothes if they aren’t dirty so the washing machine doesn't have to be run as many times

Become drip detectives. Did you know that a leaky toilet can waste 200 gallons of water per day? And a dripping faucet can waste over 5 gallons of water per day! So teach children to become leak detectives so the problem can be fixed right away!

Water is everywhere! We use water every day and often it goes underappreciated. Children can learn a lot about water when a few fun and engaging water activities are implemented. 


Pollination Activities for Elementary Science

When we think of warm weather, we generally think about sunglasses, flip flops, sun, flowers blooming and the promise of summer days at the lake. And as a teacher, I also start to think about how those beautiful blooms came to be…enter pollination!

So how exactly does pollination work and why is it important? As spring approaches, we have a great opportunity to get outside and teach our students all about the fascinating phenomenon of nature. So let’s take a look at pollination.

Why is pollination so important? Science lessons for 2nd grade.

How Does Pollination Work?

Two worksheets, "Insect Pollination" and "Parts of a Flower" are displayed near  magnifying glass.

Worksheets to help students understand how pollination works. Both can be found in the Pollination Spring STEM activities.

Pollination is how pollen transfers from one plant to another. This is largely done by the work of bees or other insects.

The insect lands on the flower to drink nectar. In the process, pollen from the anther (the male part of the plant) sticks to the insect’s body. When the insect travels to a new plant, pollen transfers to the stigma (the female part of the plant). This is necessary for seed production.

Did you know that one bee can pollinate up to 100 flowers in just one trip from the hive? Just think about what a whole colony of bees can accomplish in a day!

Why is Pollination Important?

Pollination is an essential part of growing food. Without pollination, seeds cannot be produced. Thus, fruits and vegetables wouldn’t be able to grow. And as a result, we wouldn’t have as much healthy food available to eat. 

The Easy Way to Teach About Pollination

Looking for a FAST and FUN way to teach about pollination that includes nonfiction reading, comprehension, and a STEM challenge?

Click and print. Planning really is that easy.

Pollination Videos for Kids

There are plenty of engaging ways to teach elementary students about pollination. First, let’s check out some YouTube videos:

  1. As always, I’m a huge fan of SciShow Kids! Check out this awesome video called “Flowers and Their Pollinators: A Perfect Match!”

  2. Dr. Binocs gives a VERY detailed overview. In this animated video, Dr. Binocs goes into depth describing the male and female reproductive parts of plants. He also describes how pollination happens through self-pollination and cross-pollination. 

  3. In this video Jovanna interviews Dr. John Purdy. Together they answer an important question: Why do we Need Bees

Take a Peek at pollination outside!

While studying nature, why not go outside and get right in it? On a nice day, head outside to see pollination in person. Go on an outdoor walk in the springtime and look for pollinators in action.

Have students make observations about what they are witnessing. Not only is this a fun activity that activates their detective skills, it also helps kids to see the value of animals that pollinate. Bees and insects are not just pests, they have an important job to do!

Nonfiction Reading Activity

What are Pollinators” is a set of leveled nonfiction reading passages and corresponding reading comprehension booklets.

Nonfiction reading all about pollination makes a great quick (and no prep) activity. Print off and photocopy this nonfiction reading passage about pollination. This activity was designed to be an easy way to differentiate your instruction because it has two levels of reading passages and two levels of comprehension booklets.

Busy Bee Game

If your students enjoy running around and being active, play a game of “Busy Bee”. This is a game I invented, but you’ll probably see where I gleaned inspiration for this game.

Place a number of hula hoops on the floor of the gym or in a field. These will be the flowers. Put a number of bean bags into half of the hula hoops. The bean bags are pollen. Students are working together to transfer beanbags to all the hula hoops.

If you want to add an extra challenge, you could add in a time challenge; see if students can complete the task in under 2 minutes! 

Pollination STEM Challenge

A worksheet with a flower in the middle is on a table. There are two small containers of green and pink paint. A popsicle stick with a bumble bee is laying beside them.

Pollination Painting is a great STEM Challenge for second and third grades.

This pollination STEM challenge is super hands-on… plus it’s a great art tie-in. Students will use the materials provided to build a device that transfers paint “pollen” from a station in your classroom to their papers. In the end, you’ll have created a piece of art that will display nicely on a bulletin board!

Students will be given a template of a flower (from this Pollinators STEM activity) and then they’ll have to figure out a way to transfer paint to the flower template.

stick-it-to-me Pollination Experiment

Do your students love doing hands-on experiments? Why not have your students try to discover creative ways to attach various objects to their own bodies! For instance, students might discover that various materials stick better to velcro than others. Or students might discover that some tapes are stronger than others. This little experiment is a fun jumping point for discussing how pollen sticks to insects.

Pollination is an important part of nature. And it’s an exciting topic to teach our students. What pollination activities are you going to use to teach your students? 

Pin me for later!

Lessons about pollination for 2nd grade. Picture: a bee sits on top of a white flower.

Lessons about pollination for 2nd grade.
Picture: a bee sits on top of a white flower.

How Seeds Disperse - Elementary Science Activities

Have you ever seen a chipmunk running around with food in its cheeks? Or come upon a buried stash of acorns? These are not just fun discoveries, they are examples of seed dispersal in action! Teaching students about how seeds are dispersed is such a fun science topic, and there are some interesting/interactive ways to teach how seeds spread.

Text reads : All about seed dispersal, activities and experiments for elementary science. Picture is a seed packet and sprout on a blue background.

All About Seed Dispersal: Activities and Experiments for Elementary Science

How do seeds disperse?

Let’s take a quick look at what seed dispersal is. Essentially, seed dispersal is the way that seeds spread around so plants can grow in new areas. Without seed dispersal, plants would be stuck growing in the same place season after season and the seeds would also be competing with each other for the resources needed to survive. Seed dispersal allows plants to find new locations to grow and thrive.

seed dispersal examples

There are five main ways that seeds spread: animals, wind, water, explosion, and fire. Here are a few examples:

  • Seeds get stuck on a dog’s fur and as the dog walks around, the seeds drop into new areas.

  • Seeds get eaten by a bird. The bird flies away and…how do I put this delicately?...poops on something. There are seeds in the bird’s droppings and the seeds grow in a new location.

  • Have you ever heard the term “squirrel away”? Well, squirrels store food for the winter and often bury a cache of seeds and nuts, which can lead to plants growing in new areas.

  • The wind carries seeds to new locations

  • Water lilies and coconuts rely on water to spread their seeds.

  • Eucalyptus plants have seeds with a protective layer that needs to be melted away by fire before it can grow. 

  • And some plants, like violets, will eject seeds to disperse them.

Seed Dispersal YouTube Videos

Videos are a great way to create excitement when introducing a new topic, and YouTube has a handful of really great ones about seed dispersal. Youtube videos.

Here are some fun videos about how seeds spread:

  1. This SciShow Kids video introduces students to the question “How do Plant Seeds Travel?” The video also shows the structure of seeds and how this helps seeds spread. For example, burs have little hooks on them which allows these seeds to stick to animal fur.

  2. This is a fantastic video of Maddie who explores the forest searching for seeds. She also explains how seeds get spread.

  3. This is a short one minute video that gives a quick overview. It doesn’t give all the ways for seed dispersal, but it’s a good start if you’re looking for something super quick.

  4. Want to show seed explosion? This video from the Smithsonian shows a great time-lapse of seed dispersal by explosion.

Nonfiction reading and worksheets

Using nonfiction reading in a science class is a great way to meet multiple standards in the same lesson! 

In this STEM and Reading lesson set, students read a passage entitled “How Did That Grow There?” Afterward, students complete a worksheet about what they read. This not only helps to develop comprehension skills, but it also allows them to solidify the information they just read.

Then I have students create a comic that shows a seed’s journey to a new location using one of the seed dispersal methods from the passage (I took this word for word from the project description…). This gives students a creative outlet for deepening their knowledge!

Need to differentiate? I have a 2nd set of nonfiction reading passages about seed dispersal that comes in two text levels AND two comprehension levels. It’s easy to mix and match to make the assignment work for your class.

seed dispersal stem challenge

Getting hands-on with a STEM challenge is one of the best ways to explore how seeds spread. In this activity, students will create a seed dispersal device.

Using miscellaneous crafting supplies like egg cartons, pipe cleaners, and rubber bands, students will be tasked with creating a device that will spread seeds over a distance (not just dump them in a single location).

Make sure to allow students time to plan and test their devices as well. Not only does this activity teach students about seed dispersal, but it also allows them to practice other skills like design, cooperation, communication, and revising.

float vs. fly

For another hands-on activity, try conducting an experiment about which seeds float and fly. Give your students a variety of seeds. Have stations set up with straws and bowls of water. Students can use the straw to blow the seeds to see which will fly away and they can place the seeds in the water to see which seeds will float.

Take a neighborhood walk

If you’re looking to get out in nature and your students are prepared to get a little dirty, you can do a nature walk. However, before going, give students socks to slip over their shoes. Then have students walk around. When you’ve completed the walk, have students remove the socks and check out what might be attached. Maybe they will find some seeds on the socks!

These are just a few activities to teach how seeds spread. The topic of seed dispersal can be engaging and exciting. It’s a necessary part of nature and we have the privilege of helping out students marvel at the wonder of this natural phenomenon.

Pin me for later!

Lessons about how seeds are dispersed for elementary science. Picture: a chipmunk sits on top of a sunflower with cheeks full of seeds.

Lessons about how seeds are dispersed for elementary science. Picture: a chipmunk sits on top of a sunflower with cheeks full of seeds.

Teaching The Water Cycle - 4 Creative Ideas

Integrating multiple subjects together is one of my favorite ways to teach.  I look at almost any social studies or science unit and try to think about how I can weave my other subjects into it as well.  It’s engaging for students and so convenient for me (hitting multiple learning outcomes at once… yes please!) Teaching the water cycle is one of my favorite science units because it naturally lends itself to so much cross-curricular integration.  These water cycle activities are engaging for students and just so interesting to teach.  

Teaching all about the water cycle in 2nd and 3rd grades.  Picture: A child stands in the rain under a rainbow umbrella.

Teaching all about the water cycle in 2nd and 3rd grades.
Picture: A child stands in the rain under a rainbow umbrella.

Teach About Water with Picture Books

Before we even start looking at the science of water, I want my students to understand why we are studying water in the first place.  From a guided-inquiry perspective, we are looking at the question Why is water important? I like to put this question on a bulletin board or make an anchor chart that we will refer to.

My favorite picture book to use as we explore this question is “One Well: The Story of Water on Earth” by Rochelle Strauss”. One Well is a beautifully illustrated non-fiction book that walks us through the different ways that water is used, consumed, and threatened on our planet.  From the jacket:

“One Well” by Rochelle Strauss and ”Hope Springs” by Eric Walters are displayed on a table.

“One Well” by Rochelle Strauss and
”Hope Springs” by Eric Walters are displayed on a table.

“Imagine for a moment that all the water on Earth came from just one well. This isn’t as strange as it sounds.  All water on Earth is connected, so there really is just one source - one global well - from which we all draw our water.  All living things depend on Earth’s One Well.  Life would be impossible without it.  But the water in the Earth’s well is threatened by our growing population and increased demands.  What can we do to protect it? One Well answers this important question while telling the eye-opening story of water on Earth.”

For older students, Hope Springs, by Eric Walters, is a great picture book about limited access to water.  Hope Springs is a story about Boniface, an orphan in Kenya during a season of drought. The book shines a light on the reality that many people in the world live in fear that there is not enough water for them to survive. Although the book deals with heavier content, the story is ultimately one of hope and kindness.  It’s a great book to tie the water cycle, and water conservation, into a greater global context. 


Don’t have a picture book that works? These differentiated reading passages all about water on earth a great way to introduce where water can be found on earth (and show students just how scarce freshwater is!)


“A Day Without Water” lapbook project is displayed on a table.

“A Day Without Water” lapbook project is displayed on a table.

Imagine a Day Without Water

It’s so easy to take for granted the easy access we have to water, and how often we use it!  Think about all of the times you have used water before you arrived at school.  Did you brush your teeth? Wash your face? Grab a drink? Have a shower? Rinse your plate? Turn on the sprinklers on your lawn? This lapbook project asks students to stop and imagine that, for just one day, all of their taps ran completely dry!  What would their day look like? What would be different? 

After this writing project is complete, I like to use this as an opportunity to help students connect to others who may experience limited access to water on a daily basis.  This is a great chance to talk about ways that, as a class, you may be able to help.  (Can you fundraise together? Write cards? Collect supplies?)

Teach the Stages of the Water Cycle

This one might seem obvious, but when we are teaching the water cycle, we like to get hands-on with activities and classroom displays that help students to understand the stages of the water cycle.  

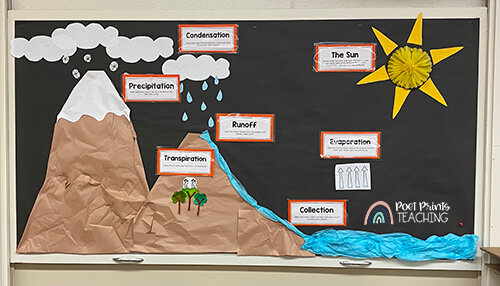
This bulletin board uses the vocabulary cards from the Water Cycle unit to display the stages of the water cycle in a way that is clear for students to understand and provides a great reference for them to come back to as the science unit goes on. I also have also had students cut/glue the stages of the water cycle onto a fun worksheet (or complete it in a digital, Google Slides version) so that they are very familiar with the stages and the vocabulary!  

water-cycle-bulletin-board.jpg

This water cycle in a bag science experiment is such a fun and hands-on way to learn about the stages of the water cycle.  I love how it uses cheap everyday materials that you probably already have in your classroom.

Make a Plan to Conserve Water

Water Cycle inquiry flipbook project.

Water Cycle inquiry flipbook project.

Once students understand the water cycle and have explored our inquiry question why is water important, we like to end the unit with a small guided inquiry activity.  This project puts students in the driver’s seat and asks them to ask the big questions about conserving water.  Students get to choose their own focus and create a flipbook to address the problem that they see!

Have any more activities to go with our water cycle unit?  I’d love to hear about them!  Leave a comment below or connect with me on Instagram

A Complete Water Cycle Unit is Here!

Looking for a whole unit? This complete water cycle unit features project-based learning, a guided inquiry project, directed lessons, small group projects, vocabulary games, and detailed teacher instructions all along the way.

No planning is needed, just print and that’s it!

Life Cycles of Animals and Plants: 6 Engaging Ideas

Spring is in the air, can you feel it? As the weather starts to warm up, and we start to thaw out a little bit up here in Canada, it’s the perfect time to think about our next set of science lessons. Spring is my favorite time to teach about life cycles because we can naturally observe them all around us. If teaching about the life cycles of living things is on your science lesson plans this spring, take a peek at six of my favorite ways to keep students engaged as we study how plants and animals grow and change.

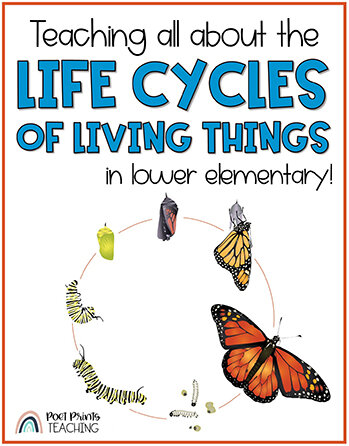
Teaching all about the life cycles of living things in lower elementary. The life cycle of a butterfly is depicted.

Teaching all about the life cycles of living things in lower elementary. The life cycle of a butterfly is depicted.

1. Grow plants in the classroom

A student observes a bean plant and writes in a plant observation journal.

A student observes a bean plant and writes in a plant observation journal.

Study the life cycle of a plant in a hands-on way by planting a bean seed in a simple plastic cup in your own classroom. (You can read all about how we used inquiry-based science to grow and study our bean plants here!) Then, we use plant observation journals to make note of the various stages of plant growth, and track the growth on a simple graph (hello, math integration!). Watching students get excited about growing their own bean plant never gets old. I’ve done this activity year after year, and I’m always amazed at how many students decide to continue growing their bean plants at home. 

2. Set up a Student-Led Reading Station

Gather books about the life cycles of plants and animals and set them up in  a reading station in your classroom.  In a perfect world, these should be available from your school or district library, but your local library may also have titles available.  Ask your students which plants and animals they are interested in! Give students time during silent reading or science to freely explore the books and learn more about the plant or animal of their choice.  Need a few reading passages at students’ levels for your station? Grab my free digital and printable life cycles of living things reading passages (with comprehension questions) to add to your reading station!

3. Head outside and observe life cycles in your neighborhood.  

If are able, walk around your school property or neighborhood in the spring! Point out buds on trees, flowers, and things sprouting from the ground. Bring notebooks and pencils to sketch examples of living things and moments in the life cycle of a plant or animal. 

4. Get hands-on with a life cycles project

Life Cycles of Living Things (4).jpg

Read about the different stages in the life cycle of a salmon and create a fun flipbook project to help students show what they’ve learned.  It’s the perfect way to integrate non-fiction reading into your science lesson. This project is part of the complete Life Cycles of Living Things science unit for second grade. 

Teach Plant & Animal Life Cycles Today!

Looking for a FAST way to plan out your life cycles unit that includes 2 full weeks of ideas? In just a few clicks you can grab all of the pieces you need: vocabulary, nonfiction reading, projects, activities, and more! Click and print. Planning is really that easy.

5. Observe a Life Cycle

Observing a complete life cycle is such a fun way to get students engaged in science.  This can be done in a few different ways:

 6. Watch YouTube videos about the life cycle of animals

Sometimes videos can give students great visual representations about simple life cycles.  Check out some of my favorites at a few different levels.

Text: Teaching all about the life cycles of living things in second and third grades.   Image: A child looks into a tank at an aquarium.

Text: Teaching all about the life cycles of living things in second and third grades.
Image: A child looks into a tank at an aquarium.

Physical and Chemical Changes - Science Lessons for Kids

What do you do when a topic seems too tricky to tackle? Up here in British Columbia, our Grade 2 Science curriculum specifically covers 'Chemical and Physical Changes' - students are expected to understand that materials can be changed through physical and chemical processes. It's a much more complex version of the question "Can this change be reversed?"

How to teach physical and chemical changes in lower elementary.

How to teach physical and chemical changes in lower elementary.

Keep Science Lessons as Hands-On As Possible

At the beginning of second grade, many students are still 7 years old. Where our lessons on force and motion had a lot of familiar language, this chemical and physical change vocabulary can seem new and overwhelming. At the beginning, students find it hard to tell the difference between a chemical and a physical change.

When trying to teach this to elementary students I've found that HANDS-ON has been (by far) the most effective method. When students can see, touch, and create different chemical and physical changes it's so much easier for them to discern the difference between the two.

Along with using proper terminology (I drill the words "chemical change" and "physical change" into their heads over and over during their entire unit!) we make sure to stop and practice these changes over and over.


Nonfiction reading passages: Reversible and Irreversible Changes

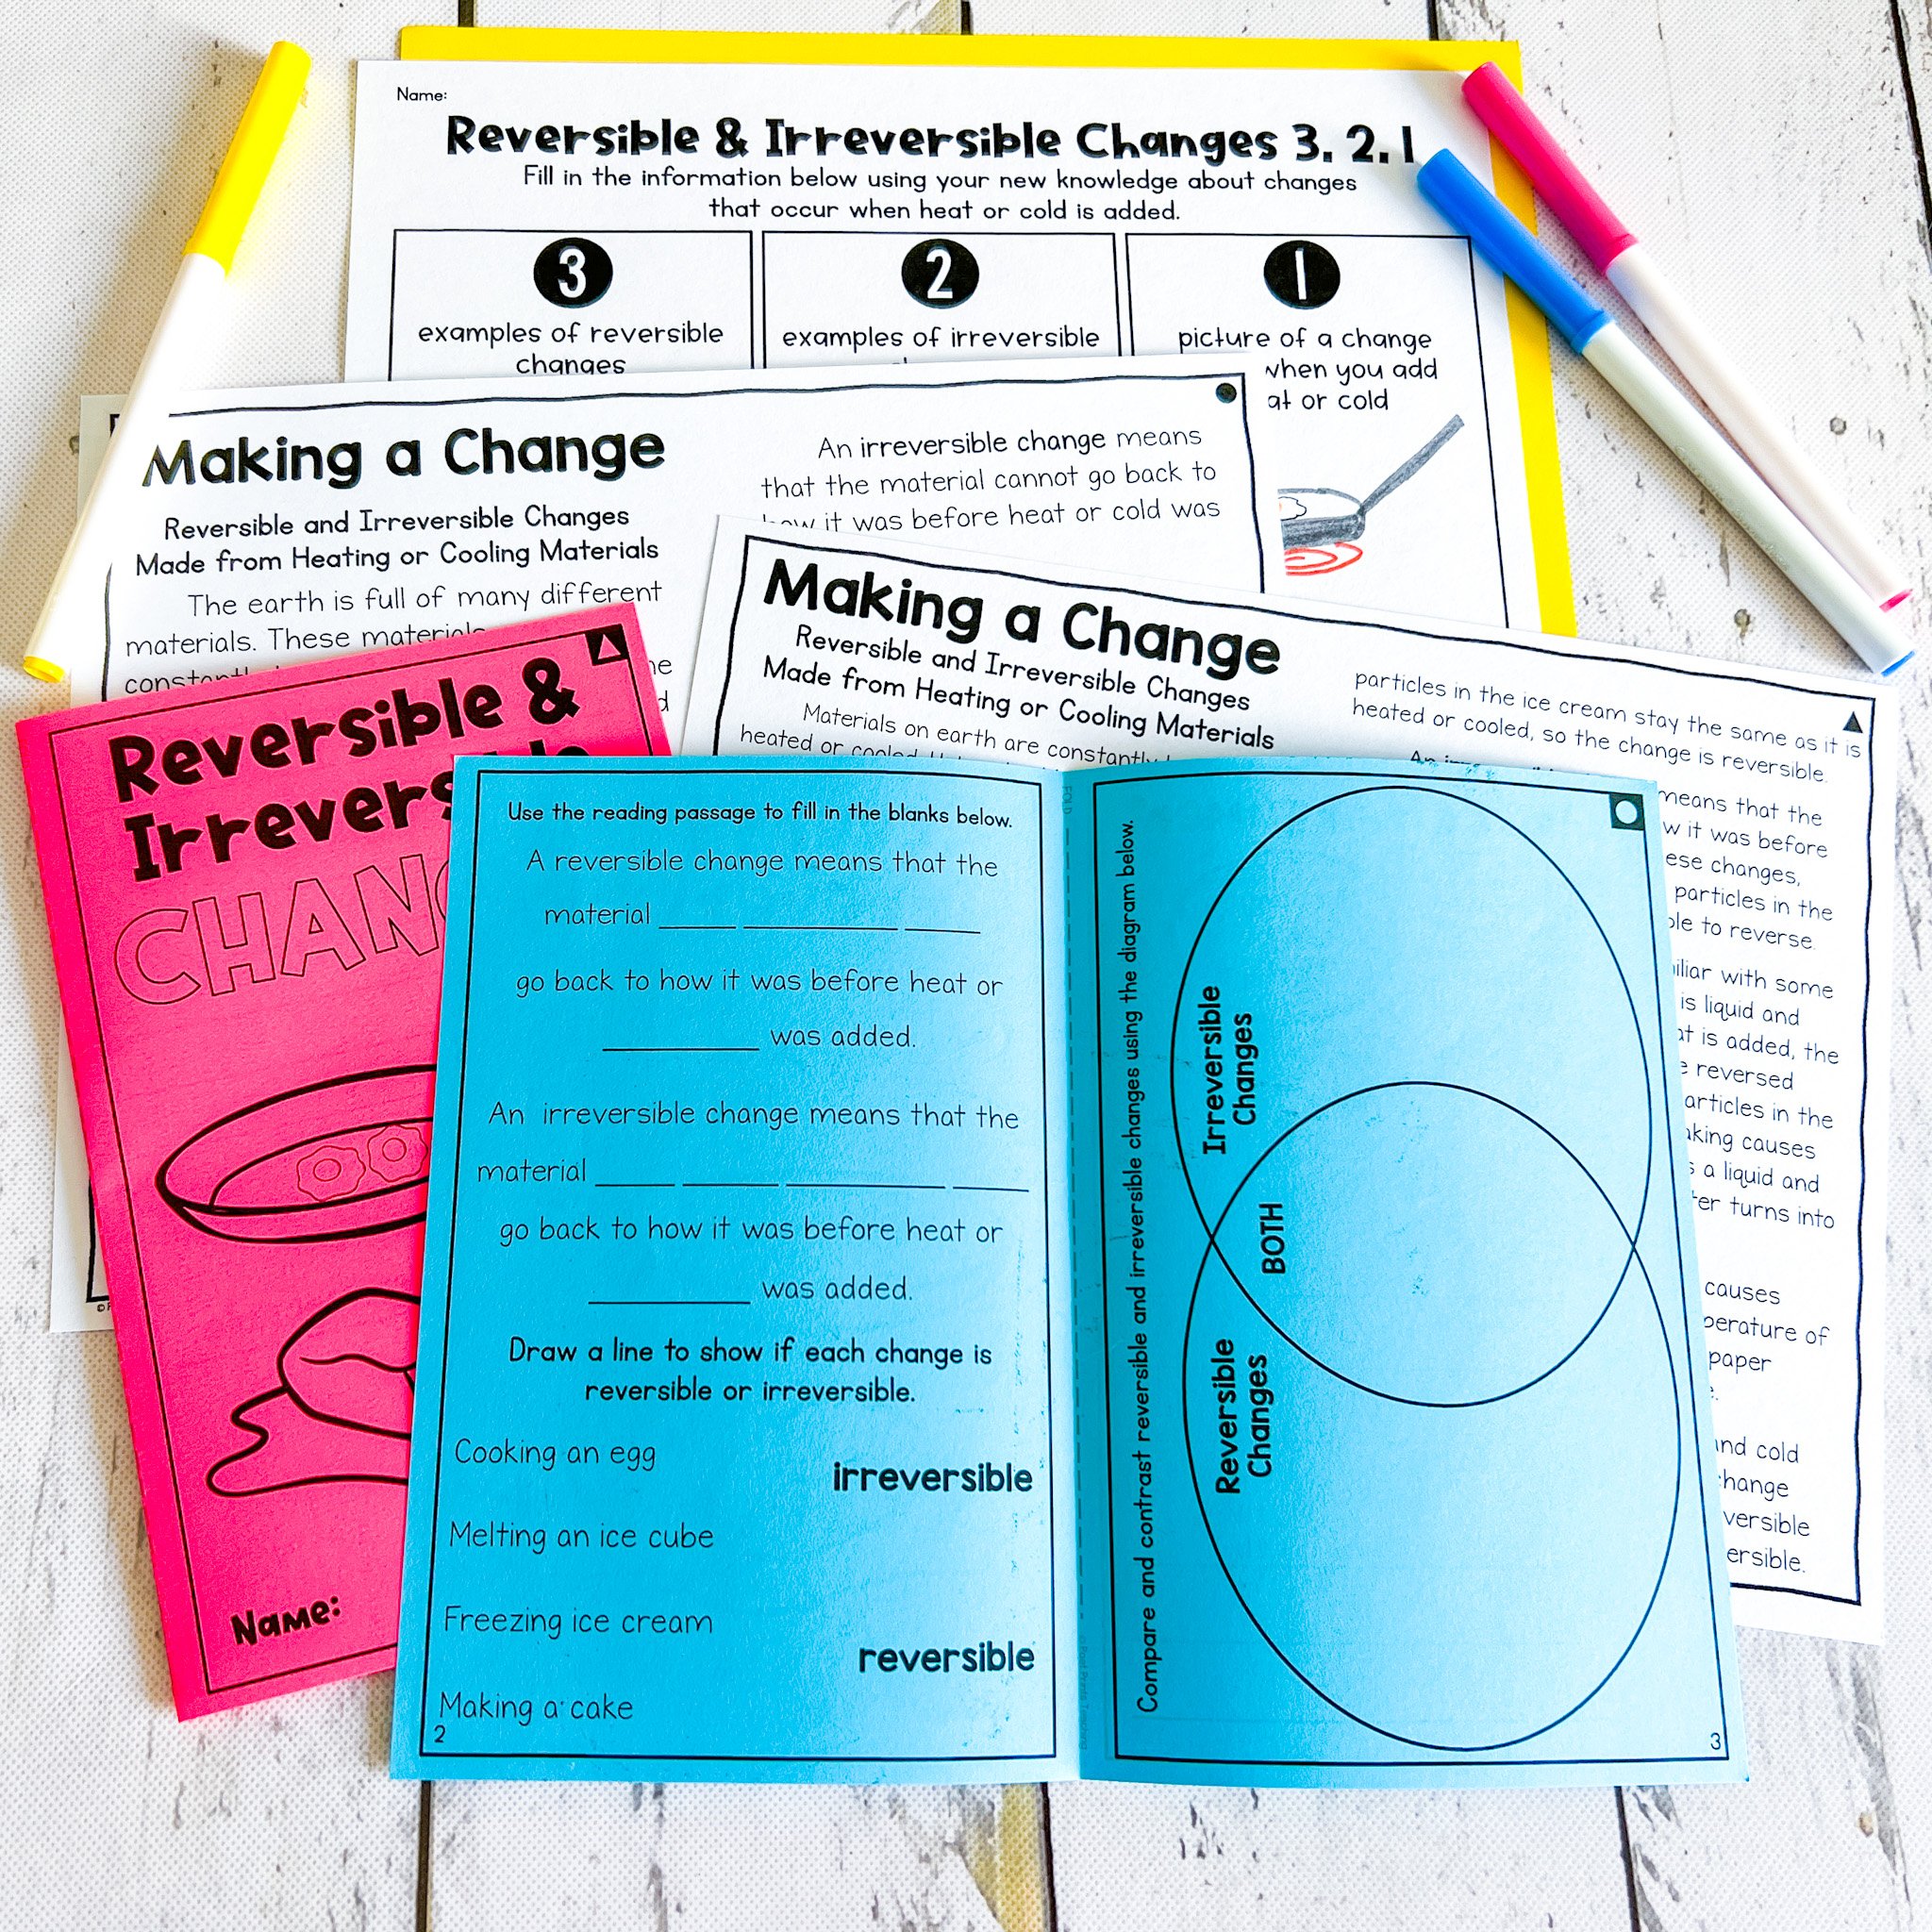
Some curriculums and school districts don’t use the terminology ‘chemical change’ and physical change’ - they go a little simpler with ‘reversible and irreversible changes’. In the NGSS for 2nd grade this is as deep as it goes. This set of nonfiction reading was designed to work with curriculums that use the ‘reversible and irreversible’ change vocabulary - but it’s a great starting point for any science lesson on this topic!


Begin with Teacher-Led Lessons to Build a Solid Foundation

Is the change physical or chemical? A Science anchor chart.

Is the change physical or chemical? A Science anchor chart.

We start our physical and chemical changes unit by front-loading information that will help them along the way. Together, we define the terms "chemical change" and "physical change" on an anchor chart (they complete their own mini-version in their science notebooks too!). Then, we work in pairs or small groups to talk about potential changes, and why they might be chemical or physical. It's a simple activity, but it helps to bring focus back to the anchor chart as they think about the questions we posed: Is something new being created? Can this be reversed? What can we observe?

Use science stations to give a real-life experience

My BEST way to help students to really discern the difference between a chemical and physical change is to try it out in as many experiments as possible. I do this using stations. Using science stations gives my little scientists a chance to use the scientific method (that we learned about here!) to test what they know about changes and decide if their experiment resulted in a physical or chemical change. I set up six different stations in the class, and we rotate through them. There are a few different ways you can do science stations in an early elementary classroom.

  • Set up six identical stations and have all students complete the same station at the same time. This one works best if your class is a little less mature and you feel they will need a lot of guidance to move through the stations. Then complete the stations over a number of different days.

  • Set up only one or two stations, with multiple stations of each. (i.e. Set up three ‘A’ stations, and three ‘B’ stations, and divide your students into 6 groups). This also reduces the number of different Science experiments you have to manage and set up at one time. The next day, set up two different sets of stations.

  • Set up 6 different stations at once. For students who are comfortable working independently in small groups, this one is my personal favorite. If we are completing this unit in the 2nd half of the year, I tend to lean towards this option. We will set up 6 different science stations, and put one group at each station. I find this option to be difficult at the beginning when small group skills are still being developed.

chemical-physical-change-station.jpg

Physical & Chemical Change Science Lessons

It’s easy to teach about physical and chemical changes with this set of scripted lesson plans! Nonfiction reading, 6 science stations, lessons, and vocabulary are all included!

Print and teach. It’s that easy.

physical-and-chemical-changes-pin.jpg
Force and Motion Activities For Kids

Teaching about force and motion is one of the most fun parts of our science curriculum! The whole topic naturally lends itself to so many hands-on experiments and challenges that it’s easy to keep kids in second and third grade engaged and having fun. These Science lessons are easily some of my favorite ones we do all year.

force-and-motion-activities.JPG

When we cover force and motion in elementary (second, third, and fourth grades) we do a little bit of everything: push forces, pull forces, friction, static electricity, magnetic force, air resistance, and more!

The Easy Way to Teach About Force and Motion

Everything you need to teach about forces and motion in 2nd and 3rd grades. Nonfiction reading, STEM Challenges, Experiments, Worksheets and scripted instructions.

Print and teach. It’s really that easy.

Start With Force and Motion Vocabulary

Although I am a big believer in student-led learning, I always start my units with teacher-led information. When I scaffold learning this way (by front-loading the teaching) I'm giving my students a solid foundation for the hands-on experiences that are coming later on. For force and motion, we start with learning all of the basic vocabulary. I'll set up a word wall, and we'll use simple non-fiction readers to help to teach unfamiliar concepts. These force and motion worksheets serve an important purpose in our classroom!

Then, when we start getting into group and student-led lessons, my students are being tripped up when they encounter words like "static electricity" or "magnetic force" or "friction" because they have a basic understanding of most of these already.

Helpful Force and Motion Videos

In the past, I've used videos and youtube clips to help students really understand these physics concepts. If you can access YouTube at school, these were great videos to help introduce new vocabulary with visual aids!

This first video introduces the difference between pull forces and push forces.

This video is all about Friction! We used it before our Friction stations to give students a little more background knowledge before some hands-on exploration. (Plus, the host is really engaging!)

Force and Motion STEM Challenges

The Force and Motion unit includes 3 hands-on stem challenges!

I have always been a big fan of STEM challenges. If you haven't done one before (*insert mind-blown emoji) , this is a GREAT place to start. The open-ended nature of these challenges let students be successful as they guess/test scientific theories at an age-appropriate level.

In our force and motion unit, we do a handful of STEM challenges and the Magnet Maze is probably one of my favorites. It's so creative and my students had the best time gathering materials and creating their magnet mazes. When they're complete, we take the time to test each other's mazes. It's a blast. You can grab the worksheets and teacher lesson plans for this STEM challenge below!

Nonfiction Reading About Forces and Motion

One of the best ways to give students scientific background knowledge is nonfiction reading. I firmly believe in integrating science and reading, it’s a great way to set students up for success. When students can access nonfiction about each science topic (at their level) it can level up the engagement.

Force and Motion reading passages and STEM extension

This is a set of paired passages all about force and motion, and using forces in real life. They’re written to be at a third grade level and are also aligned to the CCSS - so you’re meeting two sets of standards at once! This particular resource also includes a STEM challenge that’s all about catapults - the ultimate force and motion tool


‘Balanced and Unbalanced Forces’ a set of differentiated nonfiction passages

If you JUST need nonfiction reading, I have a set of differentiated passages all about balanced and unbalanced forces. It’s a good place to set the stage and teach students the differences between the two!

Ready to teach the entire Force and Motion unit? I have an entire unit’s worth of lessons, hands-on activities, and experiments that are ready to go! Everything you need to teach all about forces in second and third grade is here and ready. Just print, read, and teach.

Ideas, lessons, and experiments to teach about force and motion in a second or third grade classroom.

Ideas, lessons, and experiments to teach about force and motion in a second or third grade classroom.