Posts in grade four
Grade 4 Science - Lessons, Projects, Activities and Worksheets

Science can be exciting no matter what grade level you teach. In the early grades, students learn the five senses and how to be a scientist. In later years, students take a deep dive into topics like biology, physics and chemistry. Teaching grade 4 science can be a fun combination of worksheets, science projects and hands-on activities.

'Activities, Lessons, and Ideas to teach Grade 4 Science'

If you’ve been around here for any length of time, you’ve probably figured out that I love to teach science by doing hands-on projects, and also by integrating science into other curriculum areas: science and art, science and writing, science and comprehension. Grade 4 science is no different. There are some awesome grade 4 science projects and grade 4 science worksheets that you can use your students.

What are the topics in Grade 4 science? 

Here in BC, our science curriculum is guided by the BC Big Ideas. The BC Big Ideas for Grade 4 Science are…

  • All living things sense and respond to their environment

  • Matter has mass, takes up space and can change phase

  • Energy can be transformed

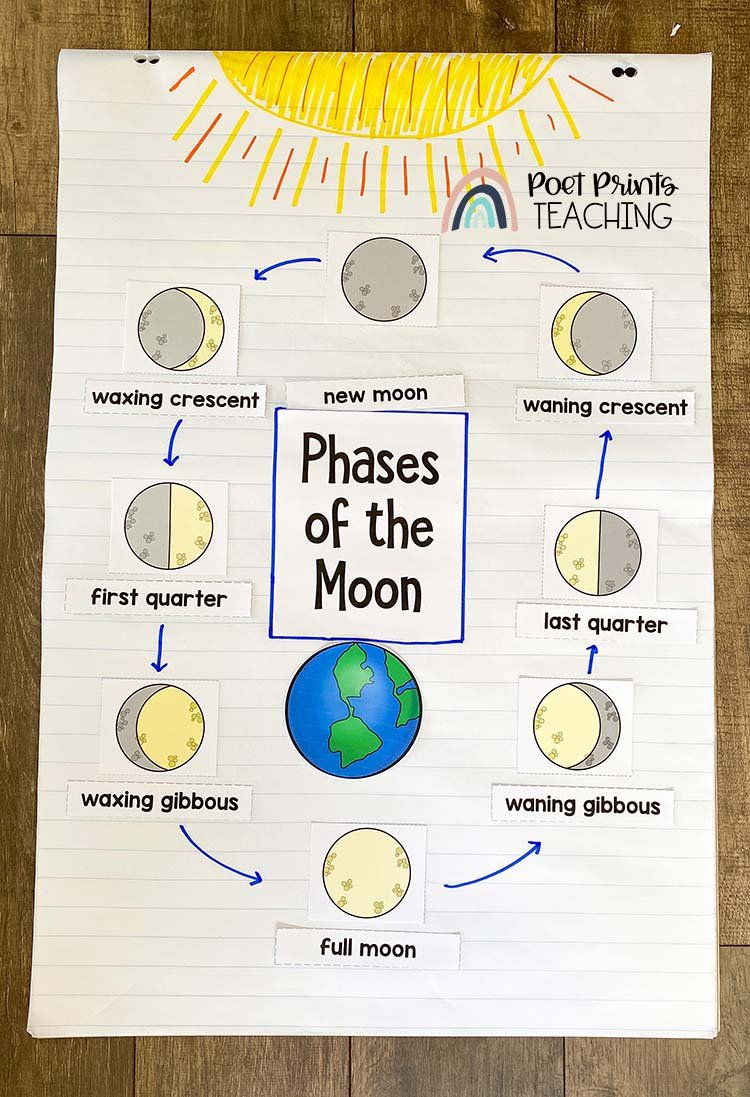
  • The motions of Earth and the moon cause observable patterns that affect living and non-living systems.

When teaching these big ideas, I teach four distinct topics: Biomes, Changing States of Matter, Energy and Motions of the Earth. To read an in-depth post on each topic, be sure to click through. 

A Grade 4 Space unit is displayed

Everything You Need to Teach Grade 4 Science

A complete (scripted) unit for every single grade 4 science unit in BC. Lesson plans, vocabulary, projects, experiments, activities, and more!

Click and print. Planning is really that easy.

Teaching about Biomes

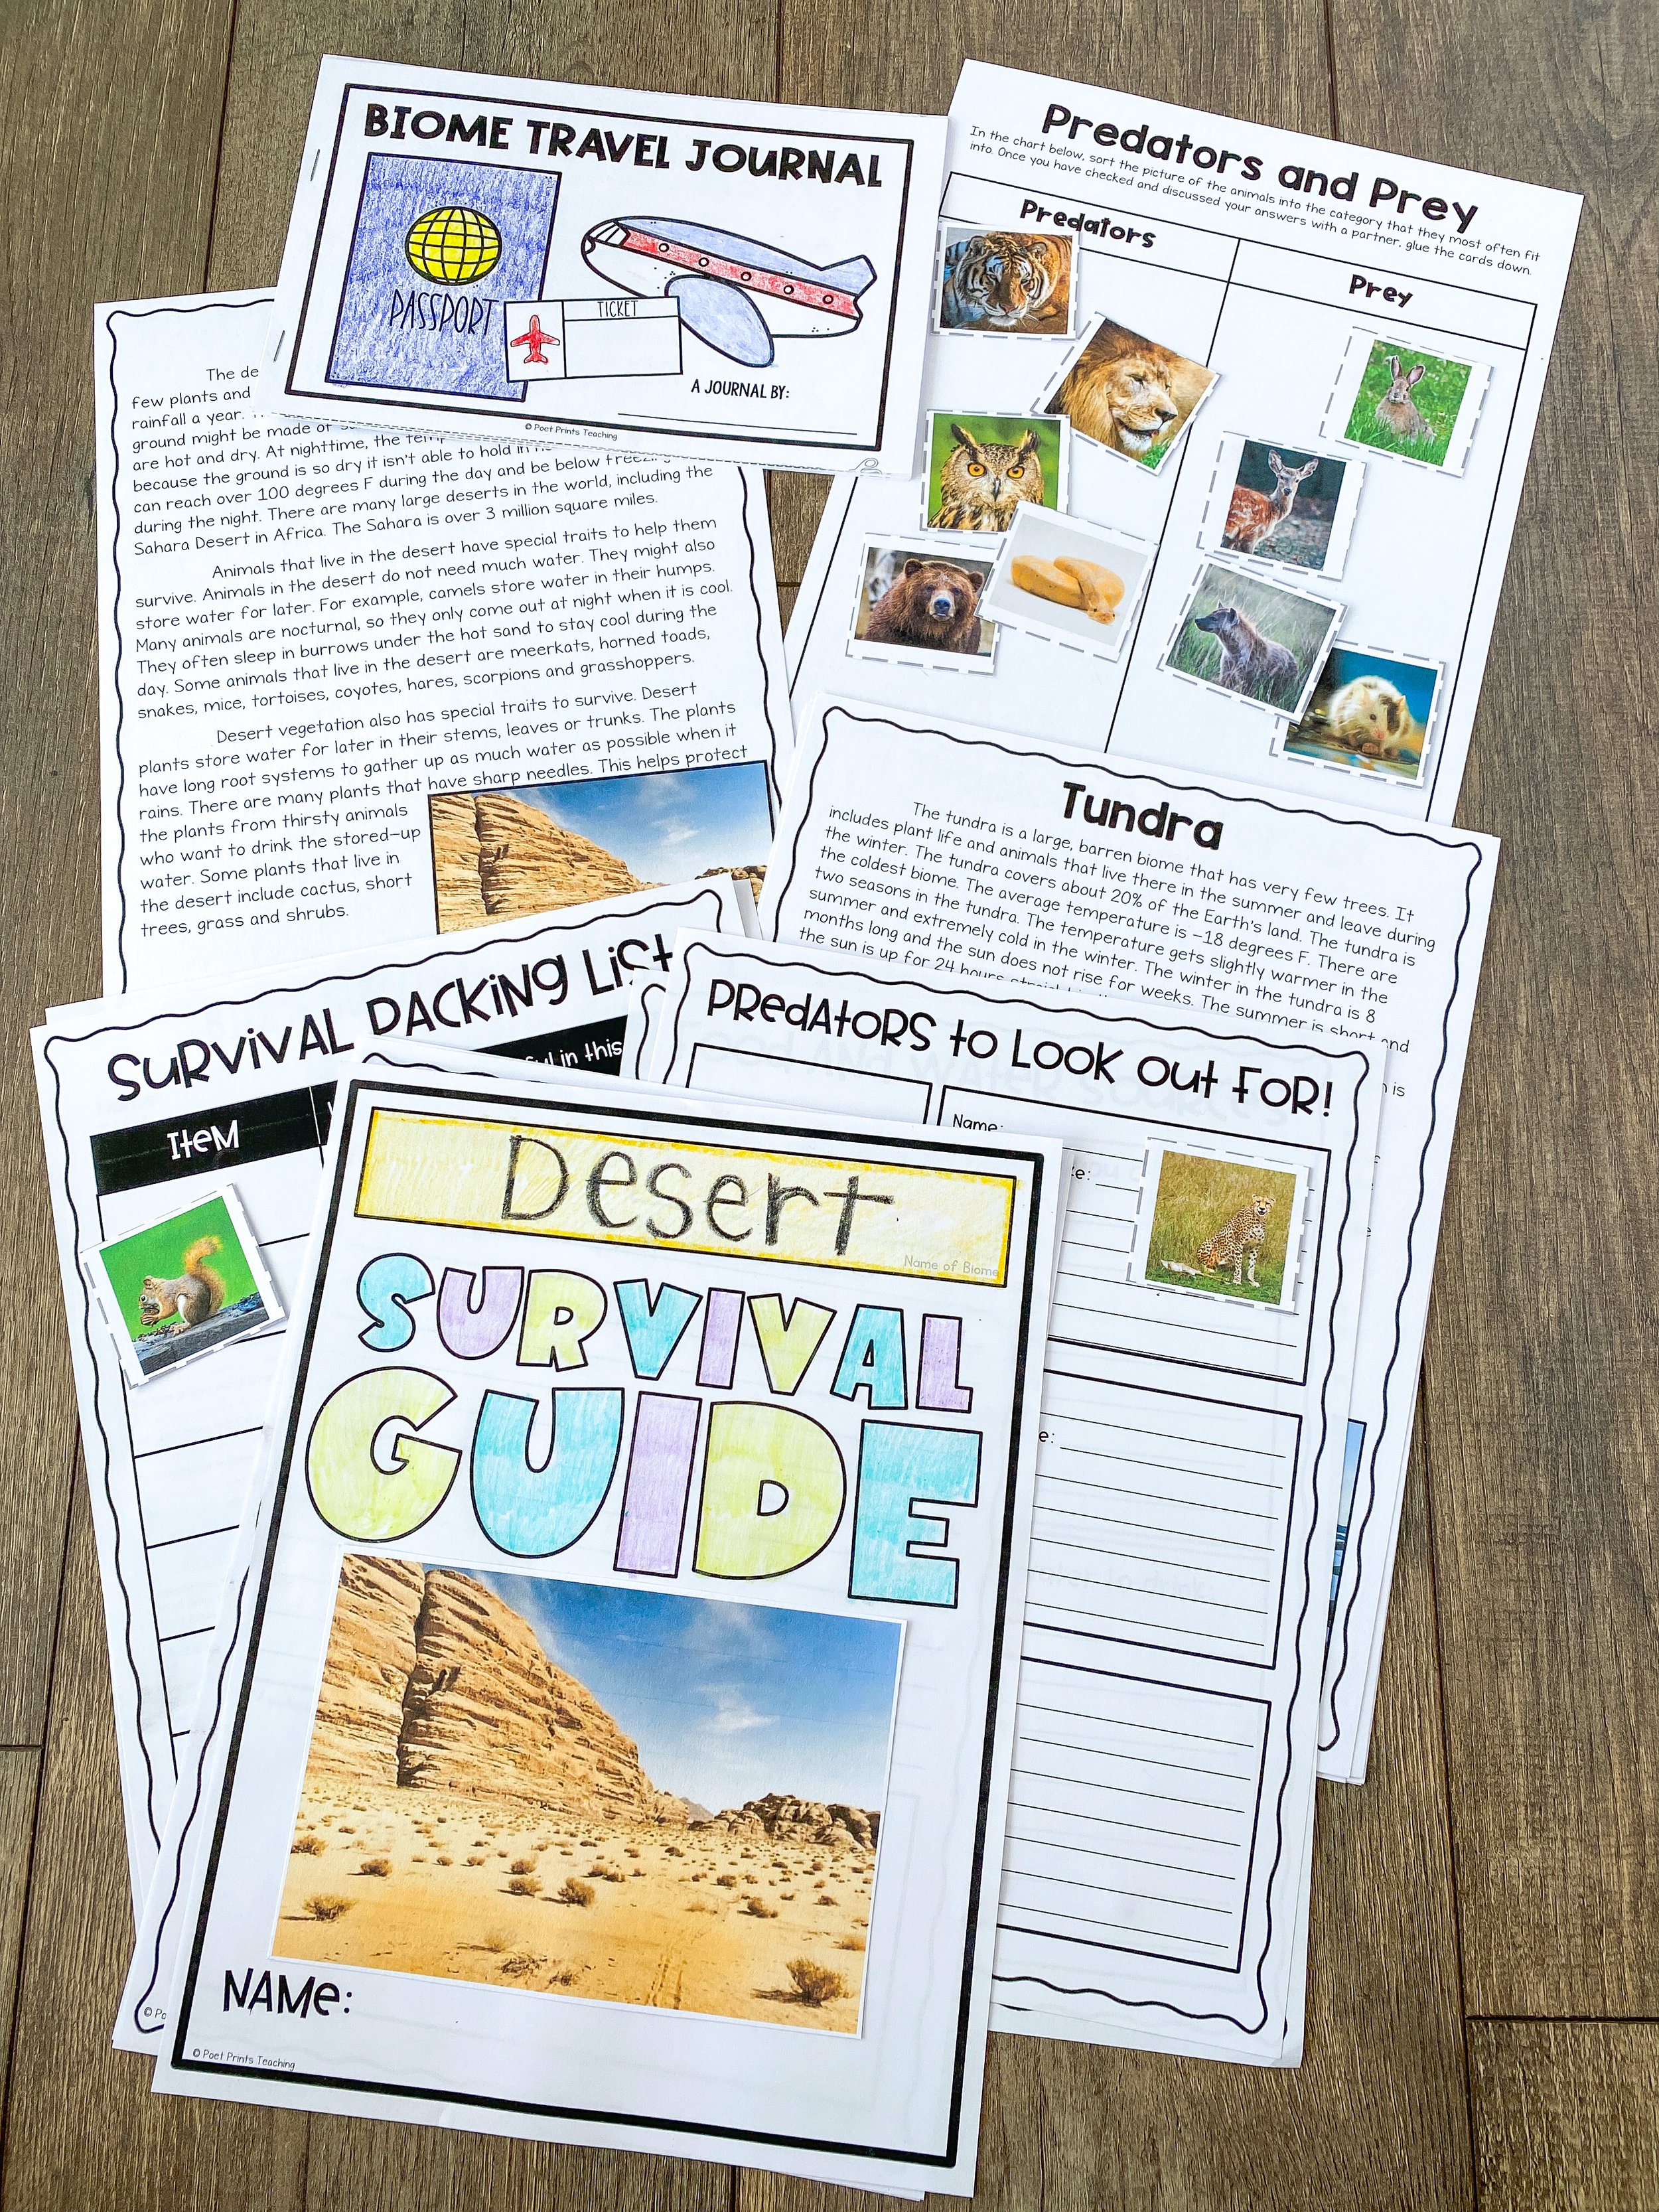
In our biomes unit, I like to highlight how animals and plants have special traits that help them survive in their environment. A polar bear wouldn’t be able to survive in the desert, just like a lizard wouldn’t be able to survive in the tundra. Why? 

After learning about the biomes and characteristics of animals and plants in each biome, it’s time to start using imagination about what it would be like to live in each biome, what traits would they need to have in order to survive? 

Check out some of my favorite activities for teaching about the biomes of the world.

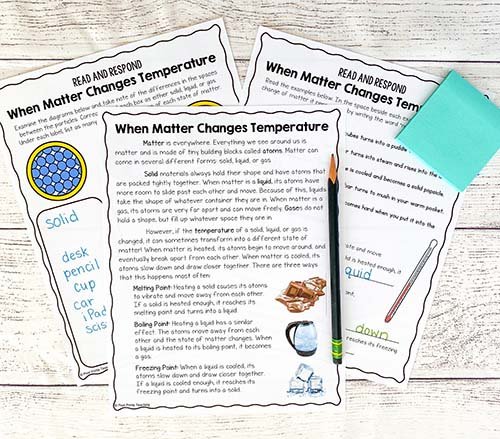
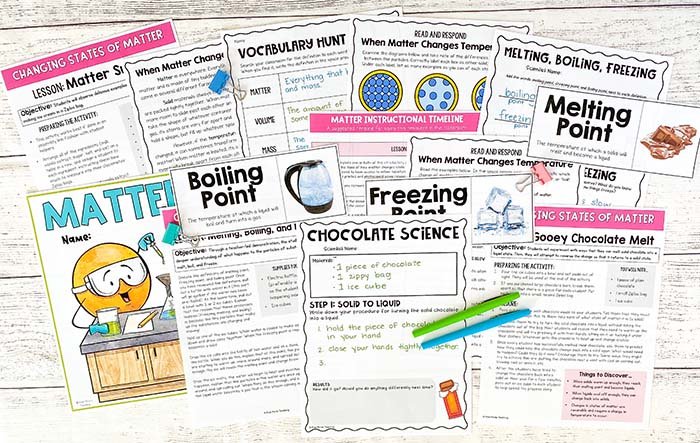
Teaching about Changing States of Matter

Matter is something that we return to again and again in the BC curriculum.

Students start learning about matter in Kindergarten and each year, the topic gets built on. So by the time students have reached grade 4, they generally have a good understanding of the states of matter and now it’s time to implement some more hands-on activities to help them engage with the topic in meaningful ways.

I also like to incorporate food when teaching about matter. When students can use all FIVE of their five senses during science, it’s always a good day! To check out some ideas, including ideas on how to incorporate food, check out this post.

This post breaks down my favorite activities and lessons for Grade 4 that teaches how matter changes state.


Teaching about Energy

When teaching about energy, I love to have a variety of hands-on learning activities. Energy is one of those topics that can naturally lead into exploration and discovery. Magnets, gravity, sound, light, push and pull….all these areas are great for hands-on experiments. Check out some of the fun ideas in this energy blog post


Teaching about Motions of the Earth

In our Motions of the Earth unit, students discover how the earth rotates, revolves and orbits. They also discover what causes eclipses and tides. Through a series of lessons, students will gain a better understanding of how the motions of the Earth affect, not only them, but the things around them. During this unit, they also get to put on their artistic hats to create comics about an eclipse. Read about everything you need to teach space science in grade 4.


What are some good science experiments for grade 4?

Grade 4 is a great age to dive deeper into science experiments. There are some awesome science experiments out there, and here are some of my favorites:

  1. Melting, Boiling and Freezing: To teach students about melting, boiling and freezing, I like to do an experiment using a transparent kettle and ice cubes. Drop an ice cube into the kettle and set it to boil. Have students observe what happens to the ice cube. Also have the students observe the steam as the water boils. 

  2. Energy Science Stations: Set up stations around the room so students can experiment with energy. Flick a marble into a group of other marbles to see what happens. Roll marbles down a track to see how height of the track affects the marble. Experiment with flashlights and glow sticks. Use a contactless thermometer to measure temperatures. You can check out even more station ideas here.

  3. STEM Challenges - I’ve rounded up some of my favorite STEM challenges that are easy to set up and use very few costly supplies (if any!)

Grade 4 is a fun age to really delve into project-based learning as well as do experiments. You’ll still have to do a bunch of scaffolding before diving into the experiments, but with the right scaffolding, your students will be ready to explore. Whether they are doing science worksheets, or science projects, there is always something to learn in grade 4 science. 

Changing States of Matter for Kids - Science Lessons in Elementary

Matter is all around us, as you might remember from your elementary school days, the states of matter can change. And when it comes to teaching kids about the changing states of matter, there are so many different activities we can do. Let’s take a look at some activities we can do to teach about the changing states of matter.

How does matter change states?

Matter is made up of atoms. And for the purpose of elementary school, there are three states of matter: solids, liquids and gases. Temperature has the ability to change the state of matter. When heat is added, the atoms move around and eventually break apart from each other. When matter is cooled, the atoms slow down and draw closer to each other.

The most common ways that temperature affects matter is through melting, boiling and freezing.

What is matter? Take a peek at this post that’s just about teaching the 3 states of matter!

We always start our unit with a set of reading passages on matter. I find that it helps to give students some background information before we dive into hands-on learning.

Changing States of Matter Videos

As always, I like to have some YouTube videos on hand in case we have a few extra minutes throughout the day. These are a couple videos I found that teach about the changing states of matter:

https://www.youtube.com/watch?v=zwCUqG7GA3Y

  • This video gives an overview of the states of matter and atoms. It also delves into the changing states of matter through melting and freezing. 

https://www.youtube.com/watch?v=gZBt4_Ds3lI

  • Here’s a brief video that explains about boiling point. It also explains why popcorn pops because of the boiling. 

Make it Delicious with Chocolate

‘Gooey Chocolate Melt’ is the most delicious experiment to teach changing states of matter. Find it here!

This is a fun activity that explores melting and cooling using chocolate. So not only is this experiment educational, but it’s also tasty!

In a nutshell, this experiment has students using their problem-solving skills to turn solid chocolate into a liquid. Each students will get their own bag with some chocolate in it. They have to figure out how to melt the chocolate. Then students will have to make predictions about how they can change the melted chocolate back into a solid.

And of course, when the experiment is finished, each child can eat their chocolate!


matter + hot chocolate?

Another great way to explore the changing states of matter is to make hot chocolate. You can even have students write about whether they think whipped cream is a liquid or a solid….what do you think it is?

Show Melting, Boiling and Freezing

For this experiment, you’ll need an electric kettle with water. A transparent kettle is best because then students can see what’s happening inside. You’ll also need ice cubes. After reviewing the definitions of melting, boiling and freezing, pull out a kettle filled with water and also put ice cubes in a bowl. 

Drop an ice cube into the water and watch what happens. Then turn on the kettle and watch what happens. As the ice cube melts and the water heats up, steam will form. 

Throughout the whole process, explain to students what is happening and have students record their observations. 

'States of Matter' lesson worksheets are displayed

Plan Your Changing States of Matter Lessons with a CLICK

Looking for a FAST way to prep that Changing States of Matter unit that includes nonfiction text AND engaging experiments? In just a few clicks you can grab all of the pieces you need: scripted instructions, vocabulary, informational text, experiments, and more.

Click and print. Planning is really that easy.

matter game

If you want to do an extension of the above activity, have your students pretend to be molecules and act out the process of melting, boiling and freezing.

Have students stand close together to be the ice. Then have them move further apart to be liquid and far, far, far apart to be gas. When you say “freezing” students will stand close together. When you say “melting” students move further apart. When you say “boiling” students have to move furthest apart. 

Into Thin Air

If you have a few days to do an experiment, you can give each child or group of children a cup. Have them fill it with water and draw a line to mark the water level. Then have the students place their cups in a sunny place, like the window sill of the classroom. Over the next few days have students make observations about the water level. 


Hands-on activities work so well for learning about the changing states of matter! When our students can use their five senses (yes, I’m including taste!), science comes alive on a whole new level!

Pin Me For Later!

'Activities and Experiments to Teach Changing States of Matter'
Activities to Teach Forms of Energy and Energy Transformation

Energy is a magnificent thing. It is something adults all wish we had more of and children seem to have an endless supply of. And yes, this is very true, but I’m talking about energy in terms of science. Teaching students about the forms of energy can lead to some pretty engaging lessons. So let’s check out four types of energy lessons.

What is the Law of Conservation of Energy?

The Law of Conservation of Energy is a law stating that energy can be changed, but it cannot be created or destroyed. Energy can change from one form to another, but energy is never lost during this transformation process.

What are the Types of Energy?

The exact number of energy types is a bit open for interpretation, but here are some of the most common types of energy:

  • kinetic energy

  • light energy

  • sound energy

  • thermal energy

  • elastic energy

  • nuclear energy

  • chemical energy

  • magnetic energy

  • gravitational energy

  • electrical energy. 

Energy is all around us and we use it every day.

Types of Energy Videos

I love introducing new concepts by showing video clips and here are some great videos about energy.

  1. Dr. Binocs is a classic science YouTube channel that many teachers use for introducing science topics. This short video goes over a few of the most common types of energy. It also delves into the concept of potential energy.

  2. This video also gives a good overview of energy. It categorizes energy into two main areas: potential energy and kinetic energy. Then the video delves into the different types of energy. 

  3. If you’re looking for a video that’s a little longer, you might love this Bill Nye the Science Guy video about energy. Did you watch Bill Nye as a kid? This video sure does bring back memories from my childhood!

Hands-On Energy Stations

These hands-on stations teach students all about how energy transfers from one form to another. (Bonus: they’re super easy to set up!)

Who doesn't love some good hands-on science stations? During this science lesson, students will complete four student-led stations. Each station will have an activity to determine the energy input and output. For example, students have to flick a marble into a group of other marbles to see what will happen. You can check out the other stations here.


Project-Based Learning: Energy Machines

I LOVE using project-based assessments to cap off a science unit. They’re a great way to check for student understanding without having them sit down for a timed test (that doesn’t always show understanding anyways!)

In this project, students will have the opportunity to design and build an ‘Energy machine’.

This machine will have the power to transform energy into different forms. As a simple example, some students might build a machine that uses a hair dryer to melt a piece of chocolate. (Electric energy to Heat Energy!)

Students will create a blueprint, gather materials and build a prototype to show their classmates! Not only is this project a fun way for students to demonstrate their learning, it is also a great way for them to use their creativity! 

The full instructions, planning pages, and assessment rubric are included in the Energy Unit.

A Complete Energy Unit is Here!

Learn all about Forms of Energy and Energy Transfer with this one hands-on unit that has everything you need.

Scripted lessons… check!
Reading Passages… check!
Hands-on projects and stations… check!
Vocabulary and Assessment… check check!

Take the planning off of your plate and grab all ten scripted lessons here…

Energy Experiments

There are SO many experiments that you could do with your class to demonstrate the various types of energy. So let’s take a look at a few types of energy activities:

  • Magnets: Give students magnets and have them locate things that are magnetic and things that are not. You can also find some other fun magnet activities in this blog post dedicated to Magnet Activities!

  • Shooting Rubber Bands: Give students different sized rubber bands and teach them how to stretch the rubber bands and shoot them across the classroom (or field outside) to see which bands fly the furthest. BUT make sure to teach them about safety so no one gets hurt.

  • Gravity: Have students drop various objects from the same high so they can see that all objects fall at the same speed.

  • Rubber Band Guitar: Students can experiment using rubber bands stretched over various objects to explore the sounds created when stretching different shaped elastics.

  • Egg Drop Experiment: Have students design a contraption that will protect a raw egg when it is dropped from a high place. How can you protect the egg from the kinetic energy it is about to experience?

As you can see, there are a plethora of experiments you can have students do while they are exploring the types of energy and energy transformation. Google has TONS of great ideas!

Motions of the Earth, Moon, and Sun - Space Science for Kids

“Ground control to Major Tom!” This song SO easily gets stuck in my head when I’m working on anything space related. And it’s not even the David Bowie version that gets stuck in my head, it’s the Chris Hadfield version, where he sings it from space. I love teaching students about the motions of the Earth, moon and Sun. There are so many awesome space science lessons for kids. So let’s check out a few!

Space Science For Kids - The Motions of the Earth, Moon, and Sun.

What’s the Motion of the Earth?

The Earth is constantly in motion. The Earth orbits around the Sun. An orbit is the path that an object takes when it revolves around another object. A revolution is the circular movement of an object around another object. The Earth also rotates on its axis. 

What causes day and night?

As the Earth orbits the Sun, it also rotates on its axis. It takes the Earth 24 hours to rotate. The side of Earth facing the Sun experiences day and the side of Earth facing away from the Sun experiences night.

Why does earth have seasons?

Top: Informational Text passages all about how the earth, sun and moon move in the sky.
Bottom: Informational text passages all about tides.

The earth’s orbit isn’t a perfect circle. This means that sometimes it is closer to the Sun and the weather is warmer, like in spring and summer. Sometimes the Earth is further away from the Sun and the weather is colder, like in the winter. The Earth’s revolution causes the changes in seasons.

What causes ocean tides on earth?

Tides are always changing and it is the moon’s gravitational pull that causes these changes. Tides rise and fall depending on where the moon is in the sky. 

Now that we have some background information about the motion of the Earth, moon and Sun, let’s take a look at some activities to get students excited about space!

Plan the Whole Unit in One Click!

Get ready to teach your ‘Motions of the Earth’ science unit in one step.

This engaging unit includes everything you need to teach students about how the earth, sun, and moon move.

Reading passages, scripted lessons, activities, and project-based learning are all included!

Make a Moon Board

Using this moon board, students can poke their heads through the middle and rotate the board to see why the moon appears to be different shapes at different times.

I love creating visuals that help my students learn. This Moon Board activity will help students identify why the moon appears differently in its separate phases. You’ll need a few things for this activity, including black foam board, 8 small white balls like ping pong balls, black paint, a print out of the Sun, Phases of the Moon labels, sharp scissors and hot glue.

Using these supplies, create a Moon Board that looks like this one. After creating the Moon Board, students can put their head inside and as they rotate the board around, they will observe each of the different moon phases! 

Detailed instructions and print-and-cut templates are available in this Motions of the Earth unit.

Want to watch me assemble this moon board? I made a Reel over on Instagram. You can check it out here.

Anchor Charts

Anchor charts are a great way to show how the Earth and moon move. I’m a huge believer that anchor charts should be made with students instead of ahead of time. I also love printing out labels and pictures so students don’t have to watch me try to draw things! Gluing labels and pictures into place is SO much easier than trying to draw and print neatly.

For example, I like to print out large cards of moon phases and put them on a chart paper to create an anchor chart. 

As another anchor chart idea, you can make a Venn Diagram anchor chart about the similarities and differences of solar and lunar eclipses. Have students come up with the ideas and you write them down as the ideas arise.

Act it Out

Head out to a place, like a field or the gym, where your students will have space to move. Then label kids as “Sun”, “moon”, “Earth”. Have your students rotate and revolve with their bodies to act out how the Sun, moon and Earth move. 

Create an Eclipse Comic

I love combining science with other curricular areas. In this activity, students will use their knowledge of comic strips and writing, as well as their artistic skills and creativity,  to create a comic about either a lunar eclipse or a solar eclipse. You will likely have to review characteristics of a comic and how to properly use speech bubbles.

Students can pick a comic template and begin to draw. Throughout the process, make sure to review and use checklists to ensure students know what criteria you are looking for in their comic. I love seeing what students come up with as they create their eclipse comics.

There are so many fun ways to teach about the motions of the Earth, moon and Sun. If you have any other awesome lessons, send them my way! I love seeing what other people do.

Around the World - Ideas for a Biomes Lesson Plan

There are so many exciting things to learn about biomes in upper elementary. Students can delve into learning the seven biomes of the world, research animals that live in each place and get a better understanding of the biome’s characteristics. There really is something for every student and every interest. Let’s check out some interactive biome lesson plans.

What is a Biome? 

A biome is a habitat with unique vegetation, climate and wildlife. The plants and animals in each biome have specific traits that help them survive.

What are the 6 Biomes of the World? 

There are six major biomes on the Earth. These include desert, temperate rainforest, tropical rainforest, marine biome, savanna (or grassland) and tundra.

Biomes Videos

As a fun introductory activity, you might want to watch a video or two about biomes. Here are a couple videos I found on YouTube:

This video introduces four major biomes: tundra, forest, grassland and desert. It’s a cartoon and goes over some of the different characteristics and animals found in each biome.

This biomes video takes a look at five biomes: desert, grassland, forest, aquatic and tundra. It also goes over some of the different characteristics and animals found in each biome. It uses real video footage of each video. We break out our sketchbooks and make a few diagrams as we watch.

Creative Writing Activity

The ‘Biome Travel Journal’ is a great way to combine reading, writing, and science!

I love combining science with other subjects: science and art, science and reading, science and writing.

This activity combines reading and writing in an engaging way to help students learn about biomes. The Biomes Travel Journal asks students to imagine that they are traveling to the six different biomes.

Using non-fiction reading passages, students will write a travel journal all about what they see and experience in the six biomes they visit. Not only will students practice their literacy skills while doing science, but they will also be able to get a little creative!

Plan Your Biomes Lessons with One Click!

Are you looking for a FAST way to plan out your biomes unit that already includes reading passages and TEN scripted lesson plans?

In just a few clicks you can grab all of the pieces you need: lesson plans, projects, activities, and assessment.

Click and print. Planning is really that easy.

Biome Diorama

If you want to combine science with art, try giving each student a shoebox or a paper plate. Then, using materials like construction paper, plasticine and magazines, ask students to create a diorama of what the different biomes look like. For example, if a student were creating a hot desert, they might use yellow plasticine to create sand, green construction paper to create cacti and other small shrubs, and cut out pictures of animals to show which animals live in the desert. 

assess it with a Survival Guide

Pages from the Biomes Survival Guide project.

After your students have had a sufficient time to learn about the biomes, a Biomes Survival Guide is the perfect way to assess learning with a project.

This is a great chance for students to present everything they have learned about a specific biome, and show that they understand the bigger concepts like climate, predators, food sources, and more!

I’m a big fan of summative assessments that go beyond tests/quizzes. This is an awesome way for students to show what they know in a way that isn’t time-sensitive and encourages creativity and critical thinking.

Biome Twenty Questions

Another fun activity you could do is a biome guessing game. After learning about the characteristics and animals of each biome, it’s time to put your student’s knowledge to the test. Put a piece of tape on each student’s back. On each tape, is the name of one of the biomes. Students then have to go around the classroom asking ‘yes’ or ‘no’ questions about the biome on their back. As they gain information, they will be able to guess which biome is on their back. 

These biome lessons are great for engaging our students in fun ways as they learn.