Posts in third grade
4 Lessons About Fossils for 3rd Grade

Do you remember when you were a kid and you would dig for buried treasure? Or did you search for dinosaur bones? And when you learned about fossils, did you search high and low for fossils in the forest, at the beach and in your backyard? Well, I think it’s safe to say that kids are obsessed with finding things like fossils. I’ve always tried to channel that energy and excitement into science lessons on fossils, because it’s such a great one to channel. Take a peek at some of my favorite lessons about fossils for 3rd grade.

How Do You Explain Fossils to Kids?

Fossils teach us a lot. They are the preserved remains of plants or animals that turn into stone over a long period of time. Our students need to understand that fossils are created through a process called fossilization. Then, we need to teach students about the different types of fossils. There are petrified fossils, preserved fossils, molds, casts, and trace fossils. There are even mummified fossils. Each fossil is created in a different way. Your students will be so excited to learn about fossils.

Make Your Own Fossils

A sure fire way to engage your students is making your own fossils. Make some air dry play dough or buy some clay, like Crayola Model Magic. Then have children press an object like a toy animal, a leaf, a pencil...really anything….into the clay. Remove the object and then let the clay dry. You’ve just made a trace or cast fossil. 

If you want to get extra creative, you can buy some plaster from Amazon or Michaels and pour the plaster into the clay mold. Let it dry and have students “excavate” the mold like a paleontologist.

Dry Noodle Dinosaurs

If you want another hands-on activity, you might love dry noodle dinosaurs. Print out pictures of common dinosaurs from Google Images. Then, using construction paper, white glue and dry pasta noodles, students can recreate what the dinosaur bones would have looked like. For example, they might use long spaghetti noodles for the neck bones of the brachiosaurus. Then they might use shorter spiral noodles for the legs and macaroni for the ribs. This is a chance for students to be creative as they create their own dinosaur fossils.


Fossils For Kids Video

This YouTube video is a great mini lesson about how fossils are formed, the types of fossils and more! 

Combine fossils with close reading!

Nonfiction reading passages all about fossils.

There is so much to learn about fossils, and one of my favorite ways to teach about fossils is to combine the science of fossils with close reading passages. When we dive into informational text it really gives students the background knowledge (and vocabulary!) to be able to interact with the hands-on materials in a new way.

In this unit, we started by looking at two paired passages: What is a Fossil and Digging Up Dinosaurs. We read both, answered comprehension questions, and focused in on ‘sequencing’ as our key reading skill.

Then, for the STEM extension, students made their own fossils using a simple air dry coffee/salt dough. They planned out items to ‘fossilize’ and sketched their completed fossils. It was a lot of fun.

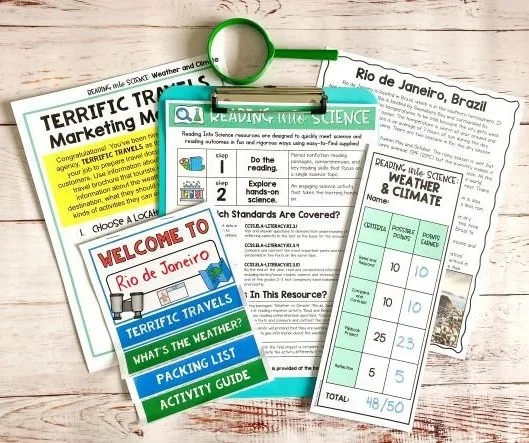
If you’re looking for lessons that are completely prepared for you, check out my Reading into Science: Fossils unit. This unit is designed to teach third grade students all about fossils. What are fossils? What can they teach us? How are they extracted from the earth? 

The lesson plans are completed for you so you don’t have to worry about anything.

Fossils are fascinating for children! Let’s help our students get fully engaged as they learn from the fascinating world of fossils.

Plan Your Fossils Lessons With One Click

Looking for a FAST way to plan out your fossils unit that already includes paired nonfiction passages? In just a few clicks you can grab all of the pieces you need: lesson plans, paired passages, reading comprehension, key reading skills, and a hands-on science extension. Click and print. Planning is really that easy.

Want to try an integrated reading and science lesson for free? ‘Bridges’ is an integrated reading and science lesson that covers NGSS standards all about the Engineering and Design process. It includes paired passages about famous bridges, reading comprehension, and a science extension. Sign up and try it out for free today.

3rd Grade Science - Weather and Climate Activities

“It’s raining cats and dogs,” “Mr. Sun, Mr. Sun”, “Down came the rain and washed the spider out…”, “Cloudy with a chance of meatballs.” The phrases about weather are endless. Kids know songs about the weather. There are stories about the weather. There are popular phrases about the weather. Weather is all around us. And it’s part of the curriculum! Take a look at some of the MOST fun (and educational!) third grade weather and climate activities. 

What is the difference between weather and climate?

Weather vs. Climate anchor chart.

Weather is a specific event, like a thunderstorm, rain or snow. Weather might last a short time, like a short rainfall, or it might last longer like a snowstorm that lasts for six days. Climate is the average of all the weather that happens in a place over the past 30 or more years. Climate describes what the weather is normally like in a region. So now that we know the difference between climate and weather, let’s look at some fun 3rd grade weather and climate activities.

We use an anchor chart like the one pictured to help kids really visualize the differences between weather and climate.


track the weather near and far

Tracking daily weather is a great (and quick!) activity to draw attention to daily weather patterns. This activity doesn’t need to take more than 5-10 minutes, and can be used for math tie-ins later down the road. Once you’ve gathered data on weather and temperature patterns for a number of weeks it’s a great chance to tie in some graphing and data outcomes!

Tracking the weather in two distinct locations is a fun and simple way to gather data and make great scientific observations about weather patterns!

We use a simple notebook journal to record the weather, temperature, and precipitation of our city.

To take this activity to the next level, use the same notebook to compare weather with a far away location. Weather apps are great for this! Have students make notes on the differences that they are seeing. We live in the west coast of Canada, and chose to follow a the weather in a city in Australia. It was so interesting to watch students research the warm daily weather in Australia during our rainy and cold season.

What is the average temperature in our location compared to the far away destination? Do we think their climate is similar to ours or different? , students can even compare and contrast the weather from a far away location to the weather at their school.

Shaving Cream Rain Clouds

Did you know that you can make it rain in a jar and you only need a few materials? Get a glass jar, shaving cream and food coloring. Fill the glass jar with water and put shaving cream on the top. The shaving cream represents the cloud. Then start dripping food coloring on top of the shaving cream. Explain to your students that when the cloud is heavy enough, it will start to rain. Sure enough, when you have put enough food coloring drops on the cloud, it will start to rain.

Pro Tip: Dilute the food coloring with water, otherwise you’ll go through a lot of food coloring drops.

Combine close reading and a travel brochure project

One of my favorite ways to teach about weather and climate is to combine the weather and climate with paired close reading passages. When we dive into informational text it really gives students the background knowledge (and vocabulary!) to be able to interact with the hands-on materials in a new way. 

In this unit, we looked at informational texts about Weather and Climate and then dug into a set of paired passages about the weather and climate in two very different locations in the world: Rio de Janeiro and Moscow!

Then, students were asked to imagine that they have been hired by “Terrific Travels”, a fictitious travel agency. In a project-based learning activity, they were tasked with designing a travel brochure for a terrific destination, and needed to include information about the climate and weather! It was a great way to have students show their understanding of climate and weather in a way that wasn’t just worksheets. (Plus, it was so easy to prepare!)

Plan Your Weather and Climate Lessons With One Click

Looking for a FAST way to plan out your weather and climate unit that already includes paired nonfiction passages and this project based learning travel brochure? In just a few clicks you can grab all of the pieces you need: lesson plans, paired passages, reading comprehension, key reading skills, and a hands-on science extension. Click and print. Planning is really that easy.


Zip Bag Water Cycle

We learn all about the water cycle in 2nd grade up here in BC, but it fits in so nicely when teaching about weather and climate as well! With just a few household ingredients you can help to quickly explain the water cycle to your students.

Here’s what you’ll need:

  • A plastic zippered bag

  • Food coloring

  • Tape

First, pour some water into the bag. It should be enough to cover the bottom of the bag by ½ inch to an inch. Add a few drops of food coloring so students can see the water better. Blue is preferable to best represent water, but any color works! Close the bag and tape it to a window or a wall facing a window.

As the water warms, it will start to evaporate. But the water vapor won’t be able to escape the bag because the bag is sealed. The water vapor gets trapped at the top of the back and eventually starts to cool. As it cools, it condenses like a cloud. When it condenses enough, it falls down like rain. While this isn’t a perfect illustration, it gives the students a great sense of the water cycle and how clouds and rain form. 

Bill Nye Explains Climates

Were you a huge fan of Bill Nye the Science Guy when you were a kid? I sure was! I loved watching Bill Nye do experiments and explain science in fun ways. Well, I stumbled across this episode of Bill Nye all about Climates! Check it out:

Climate and weather are literally all around us. Let’s commit to teaching them with excellence so our students have a solid understanding of climate and weather.


Want to try an integrated reading and science lesson for free? ‘Building Bridges’ is an integrated reading and science lesson that covers NGSS standards all about the Engineering and Design process. It includes paired passages about famous bridges, reading comprehension, and a STEM extension. Sign up and try it out for free today.

4 Easy STEM Challenges for Third Grade

Are you trying to integrate more STEM challenges into your classroom? Are you struggling to find ideas that are quick to set up and don’t necessarily require you to spend a ton out of pocket? Hands-on science is the backbone of my third grade classroom - we absolutely LOVE any activity or lesson that lets us build with our hands and think outside of the box. I have four easy STEM challenges for third grade. These ones are quick, easy, and won’t cost an arm and a leg! 

Text: 4 Easy STEM Challenges for Third Grade
Image: Text is displayed over colorful beakers.

What Makes a Good Stem Challenge?

Before we dive into the challenges, let’s talk about what makes a good STEM challenge! For me it comes down to a few core things. It has to be engaging. Hands-on challenges are a great way to increase engagement. Another key area is doing a STEM challenge that is student-centered. Students want to be doing the challenge, not watching their teacher do it. And a good STEM challenge should be open-ended so students have freedom to explore and discover while creating.

paper chain challenge

One of the EASIEST stem challenges for third grade is one that uses almost NO supplies at all… the paper chain challenge! For this challenge, all you need to give your students is tape and a single piece of paper. It’s that easy (and that cheap!) Then, challenge them to see how long of a paper chain they can make using only one piece of paper and tape. (Want to extend the challenge: limit your student to 12 inches of tape!) My students have loved this challenge and I’m confident your students will too!

Build a Bridge

Let’s look at some examples. In this free Reading into Science unit, students read about famous bridges and then they get to build bridges in an engaging STEM challenge. Using materials like large popsicle sticks, clothespins, classroom books and tape, students will design and create a bridge. You can even challenge students to design a bridge that will hold up something heavy, like textbooks. This engaging resource for third grade combines paired informational text, reading skills and a STEM challenge in a way that is sure to leave your students ready for the next one! You can grab it for FREE below.

create the tallest tower

A small tower is built with toothpicks and gummy candy.

This tower has been created with toothpicks and gummy candy!

If your students love building the bridges, they will inevitably love trying to build the tallest tower in the class. In this integrated science and reading unit, students will read about real-world skyscrapers. Then they will engage in a STEM activity to build the tallest tower using whatever materials you have in class. This STEM activity is left purposely open-ended so that you and students can choose materials that you already have on hand. Students could build towers using things like index cards and tape, toothpicks and gummy candy, spaghetti and mini marshmallows, playdough and bamboo skewers. The list could go on and on. Students will love creating and competing with each other to build the tallest tower.

droplets on a penny

This STEM challenge requires a penny (or a nickel… any coin with a defined lip around the edge), water, and an eyedropper/pipette. Begin this challenge by asking students to make a hypothesis: “How many drops of water do you think will fit on top of the penny?” Record their answers. Then, begin the challenge. I can almost guarantee that they will be very surprised by the answer. “The Sci Guys” on YouTube break down this experiment in greater detail. The scientific explanation starts at the 2:20 mark.

Well, there you have it, four engaging and easy STEM challenges for third grade. And they’ll hardly cost you a thing! w Do you have any favorite STEM Challenges? If so, I’d love to hear about them! 

Pin Me For Later!

How to use Paired Passages in 3rd Grade Science Lessons

What are paired passages? I’m so glad you asked! Paired passages are two texts about the same topic. First, students read the passages independently. Then, students use their reading skills to analyze the passages together. Using paired passages is an important skill in third grade. They often show up in tests, and being able to compare two informational texts is a really important skill when conducting scientific research.

Text: How to Use Paired Passages During 3rd Grade ScienceImage: Text is displayed over an image of four children reading a book while laying on the grass.

Text: How to Use Paired Passages During 3rd Grade Science

Image: Text is displayed over an image of four children reading a book while laying on the grass.

Paired passages are often used in a literacy lesson, which is a great place to start! But I’m a big believer in integrated learning. Students shouldn’t only be using paired passages in literacy lessons. They need to know how to read two texts and use their key reading skills in scientific settings as well. So let’s dive into how to use paired passages in third grade.

Pick the Passages

These paired passages all about Fossils come from the integrated reading and science unit “Fossils”.

The first step is choosing paired passages that go with your current science standards. If you’re learning about fossils, pick two passages that look at fossils! Maybe you want students to learn about dinosaur bones and dinosaur fossils, so you find passages about how paleontologists find bones and fossils. If you’re studying life cycles of ocean fish you may find a passage about fish that live in coral reefs and another passage about fish that live in the trenches. Or maybe you want to teach students about cause and effect, so you pick a passage about garbage in coral reefs and a passage about how straws affect turtles.

Give it a try for free! The ‘engineering design process’ is a scientific standard for second, third and fourth grades and this set of paired passages addresses two famous bridges: The Golden Gate Bridge and the Sidney Harbour Bridge.

Annotate the Passages

After picking the texts, it’s time to read them with students and teach them how to interact with the text. Have students annotate the passages. I like to teach students how to locate important information and then use a highlighter. Teach them how to pick out key words and phrases, instead of highlighting huge chunks of text. Teach students how to find similar information in the paired passages.

For example, if they are trying to identify features of fish, they shouldn’t be underlining information about coral reefs. They should only be highlighting the information about features of fish.

Focus on a Key Reading Skill

It can be overwhelming when you first start teaching students about paired passages, so focus on one key reading skill at a time. Reading skills aren’t just for literacy lessons… they can be integrated into other subjects as well, including science! It’s important that students learn to compare/contrast, understand cause and effect, and know the difference between fact and opinion. But don’t feel any pressure to teach ALL these skills with the same paired passages.

Focus on one reading skill at a time so students can practice effectively.

If you’re looking for some third grade pair science texts to get you started, I have several available in my shop (links to resources). These are a great place to start as you continue on your journey of teaching reading skills while using paired texts. 

Once you start using paired passages in science, you’ll never want to go back to only using them in literacy lessons.

Integrate Your Reading and Science!

Looking for a FAST way to plan out an integrated reading and science unit that already includes paired passages? In just a few clicks you can grab all of the pieces you need: lesson plans, paired passages, reading comprehension, key reading skills, and a hands-on science extension. Click and print. Planning is really that easy.

How to Integrate Science and Reading

I don’t know about you, but my classroom always seems to be short on time. Traditional classroom schedules have always taught each subject separately: math, reading, writing, science… all done in their own blocks. But we know that integrated learning is such an effective way to teach learning targets at once. Integrated learning blends subjects together, teaching more than one at the same time… and I am a HUGE fan of integrating science and reading, especially in 3rd grade.

reading-and-science-integration-header.jpg

Why is reading important in science?

So much of science involves carefully examining informational text. Scientists do extensive research on a topic in order to determine if the topic is worth further investigation. They pour through books to glean information and make predictions, to further their understanding of a topic, to form hypotheses and research proposals. They read other scientists’ research to learn more.

Reading truly is an essential part of science. It’s an important skill for research. And it’s our job to help students learn how to do this accurately. We can teach them how to gather information. What kinds of information to look for. How to understand the information.

Teach Students to Examine Informational Text

First, we need to teach students how to look at informational texts. There are so many genres out there. We need to teach students how to navigate these. Students need to read informational texts differently than fantasy texts. They need to read fiction texts differently than nonfiction texts.

So, first and foremost, we should tell our students how to identify these texts.

From there, give students some informational text and help your students to take a closer look at it. What do they notice about the pictures? What do they notice about the vocabulary?  Read the text through together and have students make connections to things they might have experienced in their lives. For example, if you are reading about fossils, have students discuss what they know about fossils before reading. Then afterwards, have them reflect on if the information they shared is accurate or not.

Reading informational text often includes looking at the text features: headings, subheadings, bolded words, pictures, diagrams and more. The text features in a piece of informational text can give us important information as well! When we are looking at informational text I try to stop and point out what I’m seeing in each text feature.

The title of this page is ‘Digging Up Dinosaurs’ I wonder what that tells us about what we are going to read.” “What can we see in this picture? What new information can it tell us?”

Modelling our thinking, out loud, is an important part of teaching students to read informational text.

Apply Reading Skills to Science

While reading informational science texts, make sure to apply reading skills. There are several things you could do. Throw in some comprehension questions. Have students underline new vocabulary words and find the definitions. Have students sequence events from the informational text. Distinguish facts from opinions in a text. Compare and contrast similar information.

I can’t wait to share more about how I integrate reading and science in third grade. It’s saved me so much time, and I know it can make an impact in your classroom.

If you’re ready to give it a try now, take a peek at Reading into Science, my brand new resource line that integrates close reading with engaging STEM extensions! You can check out the first lesson for FREE.

Pin Me for Later!

Text: How to teach Reading and Science together!Image: Text is displayed over images of stacked books and science materials.

Text: How to teach Reading and Science together!

Image: Text is displayed over images of stacked books and science materials.

Third Grade Writing Lessons

I love teaching third grade writing lessons. There is something so special about watching the light turn on for young writers. To be sure, kids can be good writers before third grade, but grade 3 is such a great time to hone in on specific writing skills. Take a look at some of my favorite lessons and activities that help to build foundational writing skills in third grade.

Text: The Best Writing Lessons for Third Grade Image: School supplies are displayed on a blank white surface.

Text: The Best Writing Lessons for Third Grade
Image: School supplies are displayed on a blank white surface.

Writing With Transition Words

Transition Words.jpg

Teaching students how to use transition words in their writing is a great way to preserve your sanity! An essay or paragraph that has transition words, makes it much more smooth to read. I like to teach transition words near the beginning of the year so students can use them in all their writing assignments. There are several different ways to teach transition words in an interactive way. Check out this blog post to find five ideas on how to teach transition words.


teaching students to write creative stories

Writing Stories Pin.jfif

Stories are such a fun thing for students to write and also a fun thing for teachers to read! During my story writing lessons, students learn about character, setting, problems and solutions. They plan and build their own stories with a beginning, middle, and an end.

Like almost every lesson in my classroom, I use mentor texts while teaching about stories. What better way to learn how to write a story? Read a story! In this narrative writing blog post you’ll read about how I teach story writing in third grade.


finding ideas for narrative writing

Narrative Writing.jpg

How often have we all heard the sentence, “I don’t know what to write about?” I’m not the biggest fan of prewritten writing prompts, but I also don’t love to leave my students completely without any ideas at all.

This is one of my favorite lessons to help students learn to find their own writing ideas. While teaching about narrative writing, I have students pick a favorite story and then write a creative story based on that book. Narrative writing can take many forms, but students love to put a fun twist on stories they already know.


informative writing with a twist

Informative Writing.jpg

Informative writing is vastly different from story or narrative writing. In story and narrative writings, students can take creative license to make up information or details. In informative writing, students have to learn how to gather information and then write it in a way that makes sense.

When I teach informative writing, I like to have students interview their peers to gather information. This also gives them practice with asking questions. After gathering the information, they write it into a report or a news broadcast. Check out this post for more specifics on teaching informative writing.


purposeful persuasive writing

Persuasive Writing.jpg

And last, but not least, I like to teach persuasive writing in third grade. Kids are already quite good at giving persuasive arguments to their parents or other authority figures. What kid hasn’t tried to negotiate extra dessert, a playdate with a friend or staying up late on a school night? What kids need to learn is how to turn those arguments into great pieces of writing.

In this lesson, students learn how to identify their audience, identify convincing arguments/non-convincing arguments, and write a persuasive essay. And, as you’ve probably guessed, I like to use mentor texts to help my students as they generate ideas for their writing.

The growth that students show during their time in 3rd grade is so immense, and these lessons are some of my tried-and-true favorites for this age.

Pin me for later!

third-grade-writing-pin.jpg


Informative Writing in Third Grade

“Extra! Extra! Read all about it!” The ever-popular phrase that paperboys used to yell while selling newspapers on the street. Newspapers are such great examples of informative writing. Nowadays, I don’t really read the newspaper...ever...but I do like to watch interviews online. I love seeing who or what I can learn more about. And, like many teachers, this gave me some inspiration for a writing lesson. Interviews got my thinking about authentic ways for my students to do informative writing. So, without further adieu, here is what I came up with for teaching informative writing in third grade.

Text: Teaching Informative Writing: A creative lesson for third grade that makes students junior reporters! Image: A camera is displayed on a filmmaking set.

Text: Teaching Informative Writing: A creative lesson for third grade that makes students junior reporters!
Image: A camera is displayed on a filmmaking set.

Setting the Scene

This lesson is a fun twist of informative writing as the students are the ones gathering the information firsthand. 

First, we have to introduce our writing lesson in a creative way. Make it exciting! Set the stage, by having students imagine themselves as TV interview hosts. Show YouTube clips of reporters on the scene interviewing, or news anchors giving an interview. I like to find local human-interest pieces that the students can relate to. Or show them some celebrity interview for a movie they have all seen or heard of. It’s your job as the teacher to really “sell” this part.

During this step, it’s also important to define the term “informative writing”.

Informative writing teaches a reader new and true information. 

Then look for examples of that in the interviews you watch. Make an anchor chart to track how the reporter sounds, who they are interviewing, and what information the audience learned through the interview. Track any else you want your students to be focusing on as well.

Brainstorm Interview Candidates

After watching some sample interviews and discussing them, it’s time to brainstorm. Come up with a list of people that the students can interview. There really isn’t a wrong answer, but here are some ideas to get you started:

  • A family member (mom, dad, sibling, grandparent, uncle, etc)

  • Someone who works at the school (principal, librarian, custodian, teacher, etc)

  • A friend 

  • A community worker (librarian, coach, police officer, nurse, etc)

Make sure there’s an alternative for students who might not have someone. For instance, if students are interviewing grandparents...well...not all kids have grandparents who are alive. Or, here’s another thought. Instead of doing the interviews outside of class time, you could partner students with their classmates so everything gets completed during classroom time.

Work on Interview Questions

Before students get to the interviews, it’s important to do a lesson about what makes a good question. A good question should require more than a one or two word answer. Thus, any question that can be answered with a “yes” or a “no” is NOT a good question. Make an anchor chart of good questions and bad questions. Some bad questions might include, “Do you like chocolate?” or “Do you have a brother?”. Some good questions might include “What are your plans for winter break?” or “What do you like to do when you go home from school?”

Have students write out their questions before conducting their interviews. Then teach students how to take note of their partner’s responses to the questions.

Write the Report

After conducting the interviews, it’s time for students to write their reports. Do a guided writing lesson to teach students how to turn their interview notes into a script. They will have to turn it into a third person script that could be read on the news. If you feel up to it, it’s also fun to teach them some of the news lingo like “In breaking news” or “Thank you for joining up this evening.”

Share Your Findings

There are fun ways for students to share their reports. They could write a newspaper article. They could write an informative essay. My favorite way for students to share their final essays is in an “Evening News Broadcast” style where they sit at a desk and share what they’ve learned about the subject. If you have access to a camera, it’s fun to film these so students can watch themselves later. You could even upload these onto your student’s online portfolios so parents can watch them as well. This helps to integrate media or technology into the project! 

Grab the whole Junior Reporters Unit!

This is such a fun project to do with students and if this sounds like something that’s up your alley, let me help you with some of the prep. I’ve created a Junior Reporters: Informative Writing in Third Grade” unit which contains lesson plans, planning pages for interview pages, final report templates (for either news anchor scripts and newspaper articles), and assessment checklists, interview script pages, good copy newspaper. Let me help you with the planning so you can spend more time with your students.

informative-writing-interview

Spend Less Time Planning!

Looking for a FAST way to plan this informative writing lesson? In just a few clicks you can grab all of the pieces you need. Just print… that’s it.

Informative writing lessons don’t have to be boring. They can come to life by adding some authentic flavor, such as news clips or interview clips. If you try this in your classroom, let me know how it goes! 

Junior Reporters Informative Writing.jpg


Persuasive Writing in Third Grade

The art of persuasion. It seems that many kids do their very best to persuade their parents, friends and, yes, even teachers to see their point of view. Kids are excellent at trying to persuade others to do their bidding. Even my toddler seems to be honing her skills, always trying to find ways to convince me to leave Paw Patrol on for “just one more episode.” But learning the art of persuasive writing can be tricky. So here are some tips that I’ve learned for teaching persuasive writing in Third Grade. 

Text: Teaching persuasive writing in third grade. Image: School supplies are displayed on a table.

Text: Teaching persuasive writing in third grade.
Image: School supplies are displayed on a table.

How Do You Teach Persuasive Writing to Third Graders?

You might be asking yourself: How exactly should I be teaching persuasive writing to Third Graders? Well, over my years of teaching, I’ve found that keeping it as relevant as possible is key. Don’t force kids to create persuasive writing about things they aren’t actually passionate about. Very few kids want to do a persuasive writing piece on if dates or prunes are better for you…..OK, OK….. I hope that no teacher would ever make their students write about that topic, but the point still stands. Give them topics they can get passionate about.

There are so many topics that students could write persuasive arguments about. Here are some ideas:

  • Which makes a better pet: 

    • Dogs vs. Cats

    • Snakes vs. Hamsters

    • Sharks vs. Alligators

  • Should kids be allowed to: 

    • Be principal for the day

    • Own a cell phone, tablet, laptop...really, any type of technology

    • Bring a cell phone to school

    • Bring a pet to school

    • Drive at a younger age

    • Play video games all day

  • Which is Better:

    • Soccer or Baseball

    • Bowling or Mini Golf

    • iPhones or Androids

    • Summer or Winter

    • Winter break or Summer break

    • Chapter Books or Picture books

  • Reasons for:

    • Longer recess

    • No homework on the weekends

    • No homework ever

    • More snack options in the cafeteria

    • Getting a new pet

    • Going to Disneyland on a vacation

    • Going to Hawaii on a vacation

    • Going to Mexico on a vacation (can you tell that I really want to go on vacation?)

Use a Mentor Text to Teach Persuasive Writing

So, now that you have some ideas, it’s time to teach your students what the word “persuade” means. I like to write this word on an anchor chart and then read a mentor text that is a piece of persuasive writing. I’m a big fan of using mentor texts during writing lessons.

When teaching persuasive writing, I love the story “I Wanna Iguana” by Karen Kaufman Orloff and David Catrow. This story is a series of letters between a mother and son. In his letters, the son is trying to convince his mom to let him get a pet iguana. In her letters, she is making counter arguments against his reasons for getting an iguana. Some arguments are good and some aren’t as good. In the end, Alex’s reasons prevail and he gets his iguana. While this is my favorite mentor text to use when teaching persuasive writing, there are plenty of other great mentor texts out there.

Here are a few great mentor texts for persuasive writing:

  • Can I Be Your Dog? By Troy Cummings 

  • Rufus Goes to School by Kim Griswell

  • The Big Bed by Bunmi Laditan

  • Escargot by Dashka Slater

  • Purple, Green and Yellow by Robert Munsch 


Discuss Ways to Persuade an Audience

Persuasive Writing: A type of writing that tires to convince a reader to agree with you.  How can we persuade readers? What do we want?

Persuasive Writing: A type of writing that tires to convince a reader to agree with you.
How can we persuade readers? What do we want?

After reading the story of your choice, talk about the techniques that the authors use to persuade an audience. Make sure to pull out specific examples of the language used in the story so students can replicate the language in their own writing. Then have students brainstorm other ways to persuade a person or audience. They might come up with ideas like offering a gift or incentive, using humor, appealing to a person’s emotions, scaring the audience into doing something, or using logic.

Show Examples and Non-Examples of Persuasive Writing

Next, we need to show examples and non-examples of persuasive writing. An argument isn’t always a good argument (as seen in the book I Wanna Iguana). Students need to see that some techniques to persuade aren’t effective.

We should also talk with students about when they might have seen examples of good persuasion and poor persuasion in their lives. Social media, magazine ads, billboards, radio ads, and commercials all use the art of persuasion. Drawing students’ attention to this will be helpful when they try to write their own persuasive essay.

Reread your mentor text and pause after each argument made in the story. Ask students if they think the argument was a convincing argument or not. Record the convincing and unconvincing arguments on an anchor chart so students can visually see all the arguments. This will help students more easily determine the difference between good and bad arguments.

Write our Own Persuasive Essays

As you can see, there are a lot of steps before students actually start writing. In order to set students up for success in creating their own persuasive essay, they need to understand what makes a good argument. Before they start writing, they need to do some planning. And before the students can do the planning, you need to model what this would look like. 

Students begin planning their persuasive essays.  In this example a student is planning to persuade their guardian to buy them a cellphone.

Students begin planning their persuasive essays. In this example a student is planning to persuade their guardian to buy them a cellphone.

Draw up a sample planning page on the whiteboard or on an anchor chart and walk students through the planning process. First, start with recognizing the audience. For instance, trying to convince parents to take you to Disneyland, or trying to convince your brother to start a paper route with you, or trying to convince your teacher to stop giving homework. Then have students plan their arguments.

After planning out the writing, students can write their rough copies. Give students time to edit their work. Finally, they can complete the good copies.

If you want to save yourself some time, I’ve created all these resources for you in my Persuasive Writing mini-unit package. There are detailed lesson plans broken down into five parts, differentiated planning pages, writing pages, a checklist to help with their editing, and evaluation pages for their writing. There is even a digital template included for distance learning or Google Classroom

Persuasive Writing.JPG

Spend less time planning!

Looking for a FAST way to plan out a persuasive writing unit? In just a few clicks you can grab all of the pieces you need: a lesson plans, anchor chart samples, planning pages, rough and good copy student sheets, and assessment! Just print… that’s it.

Share the Persuasive Writing - Ideally, with a Real Audience

After the good copies are finished, I love giving my students a chance to share their writing with an audience. If they wrote letters, they could read the letters to the appropriate people. They could post their essays on a bulletin board for people to read. They could read their persuasive writing to their peers. I think sharing and celebrating the finished product is important!

The art of persuasion is important. Teaching persuasive writing can be time-consuming, but it’s so worth it in the end. 

Text: Authentic Ways to Teach Persuasive Writing in Third Grade Image: Text is displayed over school supplies

Text: Authentic Ways to Teach Persuasive Writing in Third Grade
Image: Text is displayed over school supplies

3rd Grade Narrative Writing: Finding Ideas

One thing I love to teach in 3rd Grade is Narrative Writing. Third Grade is the time when students can really engage with creative writing, the writing process and narrative writing. I especially love to teach students about finding ideas. So often our students have ideas locked inside their minds and they need the proper key in order to unlock all these great ideas. One of my favorite ways to unlock their great ideas is by using their favorite books and novels! It’s so funny how kids can go from completely stuck to full of ideas in the blink of an eye and this writing lesson totally helps with the question, “I don’t know what to write about!”

Text: Narrative Writing in Third Grade, Finding Writing Ideas Image: Text is displayed over sharpened pencils.

Text: Narrative Writing in Third Grade, Finding Writing Ideas
Image: Text is displayed over sharpened pencils.

Where Can Ideas Come From?

Image: “Ralph Tells A Story” by Abby Hanlon is displayed on a student desk.

Image: “Ralph Tells A Story” by Abby Hanlon is displayed on a student desk.

So let’s talk about these ‘keys’ for a minute. As I said before, students often have ideas locked inside their minds and they need the proper key in order to unlock these great ideas. Where can Ideas come from? Kids are often stuck and need help finding ideas. I love using books to inspire ideas. I especially love the picture book “Ralph Tells a Story” for this. 

Ralph is a boy who really struggles to find an idea of what to write about. Over the course of the story, Ralph discovers that there are stories all around him! He could write about an inchworm in his backyard, the class goldfish, the markers in his desk….the stories are endless! My reluctant writers love this book because it’s funny and gives solutions for how to unlock their ideas. 

There are some other amazing books about finding ideas for writing..

  • “What Do You Do with an Idea” by Kobi Yamada

  • “Idea Jar” by Adam Lehrhaupt

  • “Any Questions” by Marie-Louise Gay

Do you know of any other amazing books about ideas for writing? Send me a message, I’d love to add them to my list!

Use Books Students Love to Find Ideas

When teaching my students about narrative writing my absolute favorite thing to do is have students use books they already love to find ideas. I want to teach my students to draw on the books they are reading to inspire a new story during personal writing time. I like to tell my students that “Authors are inspired by what other authors have written”. So I want to teach my students to be inspired by the books around them. 

So the first step that I take while teaching this lesson is to brainstorm. We brainstorm stories we already know and love. Then we think of new adventures and ideas for these characters.

  • Scaredy Squirrel - Let’s write a new adventure where Scaredy heads into space!

  • The Magic Tree House - Jack and Annie visit our classroom!

  • Who Would Win Books - We could write Butterfly vs. Bumblebee or Raccoon vs. Chihuahua 

Once students start thinking about books they are already reading, it gets easier for them to think of new ideas for the characters or book style! 

Model How to Create a New Story

Don’t forget to verbally model your through the process while you brainstorm. Students need to see how the writing process works. Creative writing first starts with creative thinking. Narrative writing begins with an internal dialogue with yourself. So don’t forget to model each step of the writing process during the writing lesson. This helps to prepare them for when they brainstorm their own story.

Wow!  We sure love Scaredy Squirrel! He’s so funny and he gets into so many silly adventures.  I wonder what else he could possibly get into?  Hmmm.  We’ve seen him be terrified to head to the beach.  I wonder how he’d feel about going to space!  What kind of things would he be scared of? How would he plan to head into zero gravity? What would he bring with him?

Write the Story 

After brainstorming ideas, I model how to create a new story. Then students will plan their story and then begin to write. After writing, I always give my students time to edit and then write their good copy. Sometimes I even let my students type their good copies on the computer.

In my Book Inspiration Writing Lesson package, I have a planning page, writing pages, and a checklist to help with their editing. There is even a digital template included in this package so students can type their good copies into a well-laid-out template.

narrative-writing-ideas.jpeg

Spend less time planning!

Looking for a FAST way to plan this writing lesson? In just a few clicks you can grab all of the pieces you need: a lesson plan, planning pages, rough and good copy student sheets, and assessment! Just print… that’s it.

Share The New Story

One thing that I’ve learned over my years of teaching is that it’s important to give students a chance to share their work. This gives them a sense of ownership of their work and it also instills pride for their hard work.

I like to mix up the way my students share their work. Sometimes I’ll create a class library of these new books. Students can read each other’s stories! (As a bonus, this may also give them new ideas for their next piece of narrative writing.) 

Other times I’ll host an Author’s Chair, where students have a special place to share excerpts from their stories with their classmates. I’ve even had my students publish their stories digitally on a secured classroom blog so parents can read the stories at home. Parents love to check out their children’s creative writing.

As you can probably tell, I love teaching the writing process to my 3rd Grade students. There is something special about teaching them about creative writing and narrative writing. Do you have any fun ways to teach the writing process to your students? Do you have any “go-to” third grade writing lessons?

5 Ways to Teach Transition Words in Third Grade

First, kids learn letters. Second, they learn words. Then, they use phrases. Afterward, they use sentences. At some point, they learn transition words. Do you see what I did there? Transition words are important to help with the flow of writing. We, as adults, often use these words without even thinking about it. But we need to explicitly teach transition words to our students. So I thought I’d put together a list of some fun ways to teach transition words in third grade.

Text: 5 Ways to Teach Transition Words in Third Grade Image: Two pencils are displayed on a red background

Text: 5 Ways to Teach Transition Words in Third Grade
Image: Two pencils are displayed on a red background

How Do You Teach Transition Words in Third Grade?

I think we can all agree that transition words are important. But we’ve all seen writing where students just repeat the same transition words over and over. How many times have we read an essay that has “And then…..And then…..And then…..” It’s up to us to explicitly teach transition words to our students. Otherwise, we’re doomed to read “And then….” essays for the rest of the school year. There are a variety of strategies that we can employ to help students learn their transition words. 

1. Write a Class Story Together

One way that I love to teach transition words is through modeled class stories. I will set up my flip chart with some transitional phrases. It might look something like this:

Once upon a time, there was a __________ and a _________.

First they _________________

Next they ________________.

Afterwards, they ________________. 

Finally, they ___________________. 

It was a _________ day.

Students love filling in the blanks together. In the end you might end up with a story like this:

Once upon a time, there was a frog and a duck. First they had a swimming competition. Next they went for lunch at McDonalds. Afterwards, they had a jumping competition. Finally, they went to bed because they were tired. It was a long and busy day.

Students like to create class stories together and share their ideas. After doing a story as a whole class, you could put students into groups and have them create their own stories, using the same template. Or you could have students create stories individually. Personally, I like doing it as a large group and then as small groups, because this fosters cooperation and communication skills.

2. Use Your Fingers

When students start thinking about the order of events in their story, I get students to use their fingers as they say each event. This helps them identify the order or first, second, third….and so on. Now, it’s OK if they use the “first, second, third…” as transition words, but you’ll also want to teach them other words to expand their vocabulary and make their writing flow better.

3. Create a Simple How-To Book

This is a super effective transition word resource that teaches students to use 3-4 transition words to write a simple instructional ‘how to’ story. As a class, we create a book titled “How to Do Almost Anything in Four Easy Steps!”. This helps to get students in the mindset of writing their ideas in the correct order and teaches the importance of basic transition words. I find that this is a great lesson for the beginning of the year. 

In this package, you’ll find sequence word cards to display in your classroom, planning paper, a self-assessment tool, the class book title page, and a variety of story papers for students to write on. 

4. Video the Outcome

To take this above resource one step further, you can have students create a step by step guide of how to make a peanut butter and jam sandwich, and then video the outcome. One of my teacher-friends does this with her class each year. First, she shows this video of a Dad recreating his children’s instructions for making a sandwich. It’s quite funny!


 After watching this video, the students have to write down instructions for how to make a peanut butter and jam sandwich. What the students don’t know is that my friend takes their instructions and creates a video of herself following the instructions. At one point, she even put peanut butter on her face because the student wrote “Put peanut butter on face.” 

Yes, this is a messy and silly idea. However, after this lesson, her students were extra careful when sequencing their writing. 

5. Traffic Light Transitions

I stumbled across the video below all about Traffic Light Transitions. It would be so easy to turn this into an anchor chart for the classroom. Students can help you brainstorm different transition words or phrases that belong in each section. 

Teaching transition words doesn’t have to be complicated. Even simple methods like these will help students to grasp the concept. And remember, the more students practice, the more adept they become at using transition words in their writing. 

BONUS IDEA: Practice transition words in journals

I am a huge fan of journal writing in third grade, it’s one of my favorite ways to build relationships and formatively assess writing. Once we have learned transition words, and students have access to a bank of transition words, personal journals are a great place to practice using them on a regular basis. Retelling events from our week naturally lends itself to using transition words, so it’s awesome practice. You can snag some of my favorite journal prompts below!

Pin me for later!

Text: 5 Ways to teach transition words in third grade Image: School supplies are displayed on a piece of paper.

Text: 5 Ways to teach transition words in third grade
Image: School supplies are displayed on a piece of paper.

Grade 3 Science Lessons - Especially For Teachers in BC

I’ve spent most of my teaching career in grade three. I have a soft spot for grade three students. There’s something about the way that they are not-quite preteens, but no longer little kids that is the perfect sweet spot for learning. Teaching grade 3 science lessons are a lot of fun, we explore atoms and molecules, look at landforms around us, get outside with biodiversity, and even grow our own plants to see life cycles in person!

Text: Science Lesson for Grade Three Image: A student examines a beaker with a magnifying glass.

Text: Science Lesson for Grade Three
Image: A student examines a beaker with a magnifying glass.

Not teaching in BC? You might be looking for NGSS (Next Generation Science Standards) aligned lessons and ideas for 3rd grade. That’s over in this post: 3rd Grade Science Topics

how do you teach science in grade 3?

When it comes to teaching science lessons in grade 3, I’ve always taken the hands-on approach. I love how invested third graders are in project-based learning, and how willing they are to try an inquiry-based investigation. Grade 3 science is perfect for lessons like these! 

But don’t be mistaken, I don’t hand students a project-based learning activity and walk away. There is so much scaffolding that goes into hands-on projects. I start every single science unit with teacher-led learning to give students at least a little background information on our new topic.  We learn new vocabulary, read informational texts to build a knowledge base, and then set off on student-led learning. I find that this approach makes our project-based and inquiry-based learning way more successful.

what are the topics in grade 3 science?

In BC, our science curriculum is mainly guided by the BC big ideas.  The BC Big ideas for Grade 3 science are:

  • Living things are diverse, can be grouped, and interact in their ecosystems

  • All matter is made of particles

  • Thermal energy can be produced and transferred

  • Wind, water, and ice change the shape of the land

When teaching these as topics, I teach these ideas in 5 distinct topics:  Landforms, Matter, Thermal Energy, Biodiversity, Plants. To read an in-depth post on each topic be sure to click through!

Teaching Local Landforms

Science-lessons-landforms-header.jpg

I’ve always been a big believer that science lessons can (and should!) be made as relevant to your students as possible. When we study landforms I try my best to connect each landform to ones in our local community or ones that may be familiar to my students. Mountains? I’ll choose the one we can see from our classroom. River? The local summer swimming spot. Lake? The one we visit during our last field trip of the year. The more I can connect our landforms unit to our local community the better. This post has my absolute favorite landforms projects and activities.


States of Matter Activities

states-of-matter-science-lessons-header.jpg

The three states of matter is a topic that our curriculum (here in BC) circles back to again and again… and with the right activities and lessons, it’s just so much fun! In Grade 3, we look at how all matter is made up of atoms, and what the atoms look like in a solid, liquid, and gas. We’ll build the particles out of classroom materials, act it out with our bodies, and get hands-on with experiments that show all three states. This post lays out how I introduce what matter is (and isn’t!) and some simple activities to get you started.


How is Thermal Energy Transferred? Science for Kids

thermal-energy-science-lessons-header.jpg

We learn about Thermal Energy after Matter so that students already have a good understanding of atoms and how particles move. I have always chosen to study thermal energy in the winter so that we can use hot cocoa to see conduction in action (as our hands warm-up) and try out various materials as insulators against the cold. There are so many fun thermal energy activities to try in your classroom!


Biodiversity Science Lessons

biodiversity-science-lessons-header.jpg

In our biodiversity unit students discover that biodiversity is literally ALL around us. This is a great unit for getting outside of the classroom. Kids love this unit because it looks so closely at plants and animals… and anything to do with animals is always a hit in grade 3. After we look at just how diverse our own local ecosystems are, I send students off to explore local biodiversity and choose a single plant or animal to research in greater detail.


Inquiry Based Science: How do Plants Grow?

I have found my plants unit to be the most successful as the final unit of the year. By this point in the year, students are capable of planting and tending to a small bean plant completely independently. They can also observe and document plant growth with little assistance from a teacher. I’ve usually conducted this unit as inquiry-based learning, and it’s always such a hit. These inquiry-based plant experiments are such great science lessons for grade 3.

Grade-3-Science-Lessons (5).jpg
Teaching Local Landforms

Teaching all about landforms is a big part of our grade three science curriculum here in British Columbia.  It’s one of my favorite units because it’s a topic that lends itself well to outdoor and interactive learning.  I try to ensure that teaching landforms is as hands-on as possible: we head outside to explore our own local landforms and we make as many student-led projects as possible!  A few things happen in my classroom to make a landforms science unit successful at the second and third-grade level… take a peek!

Text: Science Lessons About Landforms for 3rd and 4th Grades  Image: Text is displayed over an ocean landscape.

Text: Science Lessons About Landforms for 3rd and 4th Grades Image: Text is displayed over an ocean landscape.


Keep It Local

A ‘local landforms’ anchor chart.

A ‘local landforms’ anchor chart.

Teaching about landforms doesn’t have to be theoretical… there are landforms all around us! I’ve found that teaching about our own LOCAL landforms is the best way to hook students in and keep them invested in the unit as a whole.  (We did this in our biodiversity, water cycle, and plants units as well).  We try to make as many connections as possible to places and locations that are familiar to them. Even better if we can visit some of these places during our unit!


Pre-Teach Vocab

I know… I know… I’m starting to sound repetitive on this one,  but my ‘secret sauce’ to successful science is to pre-teach new vocabulary before we really dive in to a new unit.  That means starting with a few lessons on landform vocabulary.  I’ll set up vocabulary words around the classroom and we will do a ‘vocabulary hunt’ where students can search for definitions.  We might also set up a vocabulary ‘memory game’ where the vocabulary words and definitions are placed face down on the carpet and are flipped face up one at a time, just like the traditional ‘memory’ card game. These activities help new words to become familiar enough before we really dig into our science lessons. 

Get Outside and Get Observing

You will be able to find at least one landform example on your school grounds… so find it, sketch it, and label it!  Our school was ON an island, with a view of a mountain… two landforms in one! 

Nothing to observe? The outdoors is the perfect place to create a sketch of what a landform might look like on blank paper.  Sketch an island!  Draw a picture of a the place where a river meets a lake (this is called a delta).  If possible, I like to teach most of this unit from outside of the classroom.  

Explore Local Landforms In Depth

Our ‘Local Landforms’ flipbook project.

Our ‘Local Landforms’ flipbook project.

More local landforms? Shocking!  But I really do believe in making local connections to the curriculum wherever possible. We ended our landforms unit with a flipbook project that asked students to think about all of the local versions of as many landforms as we could think of.  A local lake, a local waterfall, a local valley, a local desert, a local cave, a local ocean, etc.  It was neat to watch them make connections to places they had all been or heard about. We also used our classroom devices to research places to help fill gaps for students who hadn’t had firsthand experience with each place and to add facts and details about each location. I, personally, had never been to a local waterfall, so this research component was helpful for me as well!

Teaching-Landforms-Button

Let me plan your landforms unit!

Looking for a whole unit?  The complete landforms science unit features nonfiction reading passages, vocabulary, teacher-led lessons, FUN activities, project-based learning, and detailed lesson plans all along the way.  Let me take this off your plate!

Pin me to save these ideas for later!

Local-Landforms (3).jpg